bart
|
| posted on 22/5/15 at 09:21 PM |

|
|
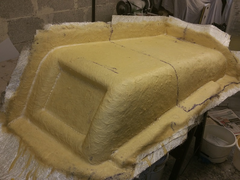
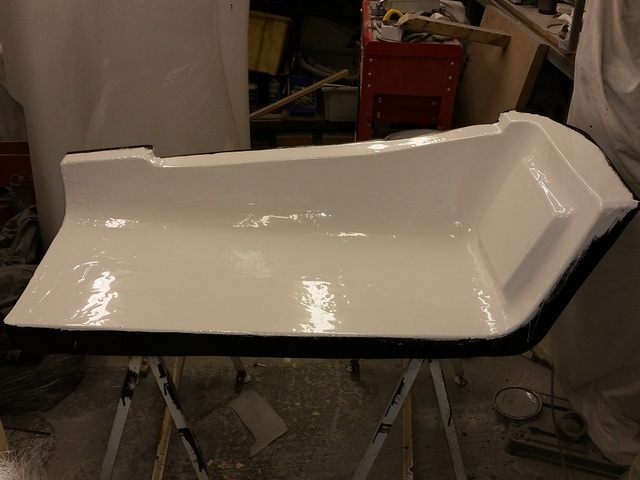
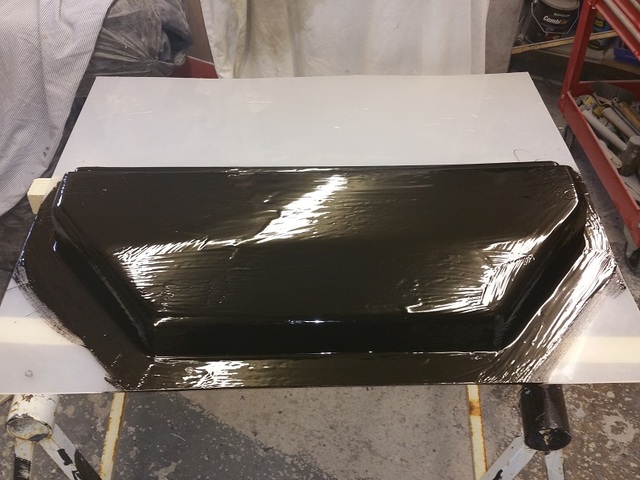
side pods final stages
hi all
some pics for those following.
this is last base coat primer resin for moulds
first coat was put on and flatted
this coat will be flatted tomorrow
then a hard coat go's on this gets flatted down to 1200 or 1500 grit then polished
pictures don't look flat as the resin was still wet and at this stage is very shinny ( well that's my excuse !)
still on target I think to finish moulds by end of Monday.
they can then season for a week then ill pull a pair of moulded parts out for a look see.
Description
Description
ps : getting a little reaction from gloss show paint I used will have to watch how that goes.
pps : brought an electric da sander from machine mart . what a tool highly highly recommended cuts work load by 90% at least
BE ALERT > BRITAIN NEEDS LERTS
|
|
|
|
|
ceebmoj
|
| posted on 22/5/15 at 10:26 PM |
|
|
looks great, do you get your abrasives for the DA from machine mart as well?
|
|
|
bart
|
| posted on 22/5/15 at 10:33 PM |
|
|
Some
Also from commercial body paint suppliers and ebay
All seam to be good
Get from 40 to 800 grit
Machine mart on pads is very expensive
Sander part no 6462010
BE ALERT > BRITAIN NEEDS LERTS
|
|
|
bart
|
| posted on 25/5/15 at 07:36 PM |
|
|
hello all
did not quite get as far as I wanted had to spend some squirrel time with the wife ( ooh look at that squirrel ect ect )
as well as falling asleep on the couch a lot ( old age )
got the lh pod full finished and ready to mould in fact as I wright this I am waiting for the mould release to dry ( 5 more coats to go , going to get
the gel coat on tonight even if its mid night !
rh needs final sanding then that's ready to go , so new target is fully finished by next weekend.
Description
finished waiting for mould release agent and a polish
BE ALERT > BRITAIN NEEDS LERTS
|
|
|
bart
|
| posted on 25/5/15 at 09:55 PM |
|
|
well its 22:50 and the first gel coat just went on
going to get second coat on tonight as well
got the heater on full in the garage recon 1:30 am for second coat if it's gone of enough
should then be able to finish that mould by tomorrow night and pull it on Wednesday.
I can then use the same flange plastics to make the rh pod , will get that sanded tomorrow in-between fibre glassing.
BE ALERT > BRITAIN NEEDS LERTS
|
|
|
ceebmoj
|
| posted on 25/5/15 at 10:02 PM |
|
|
You are making some great progress.
|
|
|
bart
|
| posted on 26/5/15 at 12:23 AM |
|
|
1.20 am and just finished final gel coat
Will try to get up early to put a coupling bonding layer of 100 fibre glass first thing before work.
Then I can put bulk coats on tomorrow night.
[Edited on 26/5/15 by bart]
BE ALERT > BRITAIN NEEDS LERTS
|
|
|
bart
|
| posted on 26/5/15 at 08:07 AM |
|
|
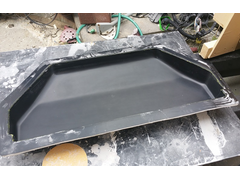
coupling coat on
hi all
well I managed to get the coupling coat on this morning before work so all going to plan !
next stage is the bulk mould coat , the one that provides all the strength , aiming to do that tonight and de mould in the morning
Description
BE ALERT > BRITAIN NEEDS LERTS
|
|
|
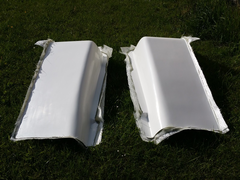
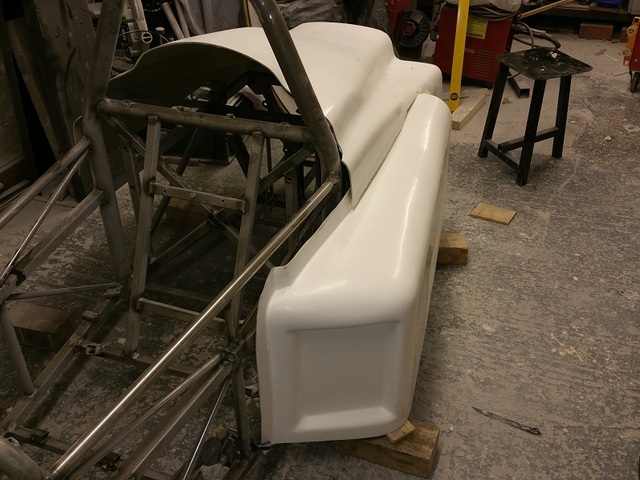
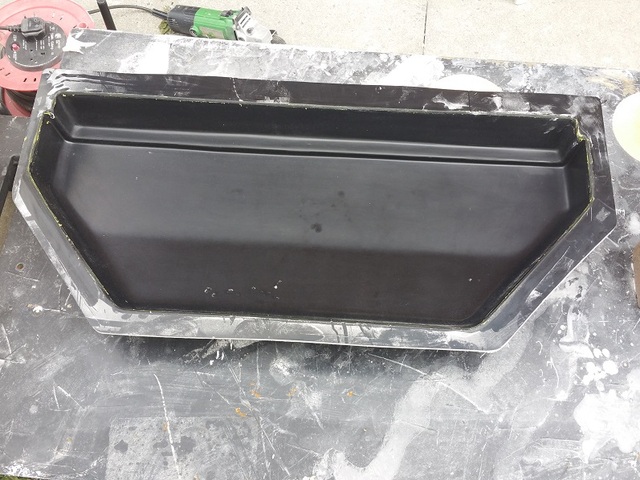
bart
|
| posted on 26/5/15 at 05:56 PM |
|
|
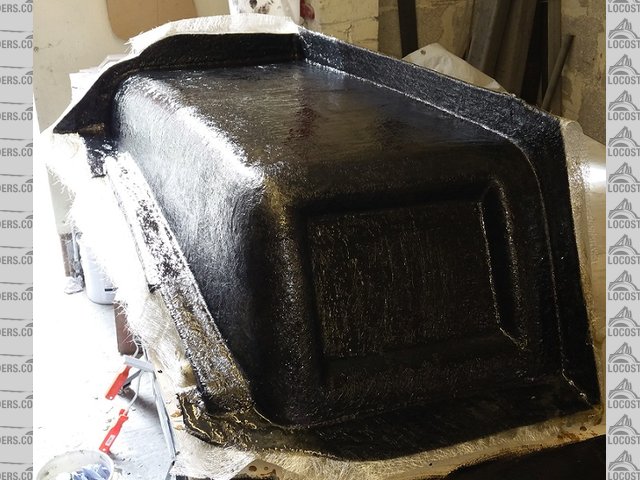
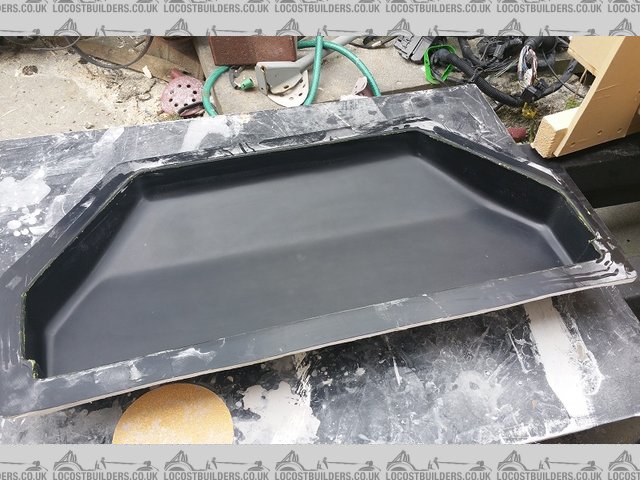
hi all
managed to find an hour dinner time to put the unimould resin on ( 4 layers )
and have just de mounted it from the buck
I am pleased with the finish
picture looks rougher than it is due to dust and wax all over the mould
rear looks terrible as its covered in white dust from the rough trim up I performed
on to the rh now.
sanded it tonight and went to far in places , think ill stop for the night as i'm tired rushing and making mistakes .

Description
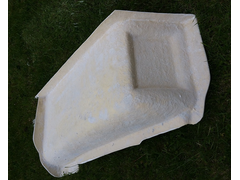 
Description
BE ALERT > BRITAIN NEEDS LERTS
|
|
|
Rosco86
|
| posted on 26/5/15 at 07:01 PM |
|
|
Coming along now mate, won't be long till it looks like a real car! 
|
|
|
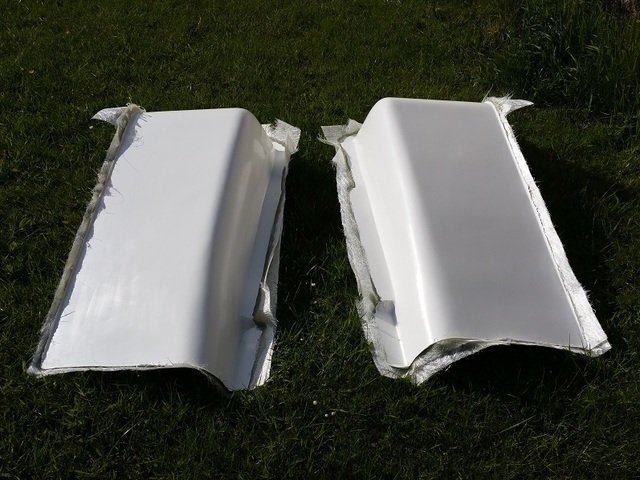
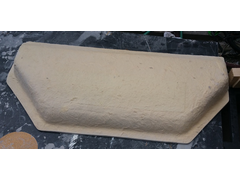
bart
|
| posted on 29/5/15 at 06:14 PM |
|
|
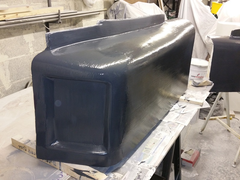
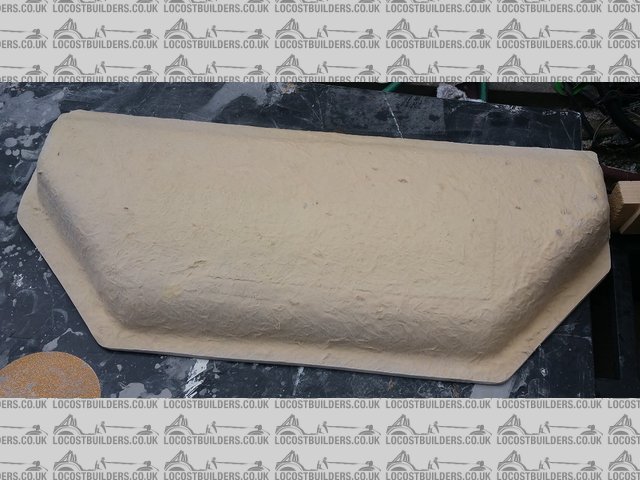
warning about face masks and RH mould for pod
hi all
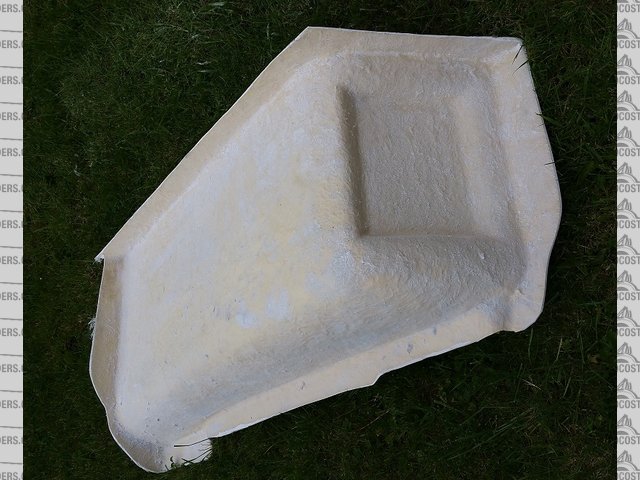
nothing to exciting tonight just the RH side pod mould is done
had a bit of excitement with TNT delivery's , they lost my unimould overcoat resin and I had already laid down the coupling coat Wednesday night
, wife waited in all day Thursday , no delivery , and covering time running out ( 48 hrs apparently )
so got up super early this morning 6 am ( WELL its early for me ! )
and dashed down to stoke for easy composite's ( highly recommended company , technical advice excellent ! )
picked up some more resin and dashed back.
made the mould and left to self cook ! ( this resin has a thermal reaction to go off )
popped the mould out about 5.30 tonight had a quick trim and looked the door will finish tomorrow
wife gave me a funny look when I innocently announced that " I just going out to the garage to pop my mould"
personally I cant see anything funny with that statement
still on the buck and not trimmed
Description
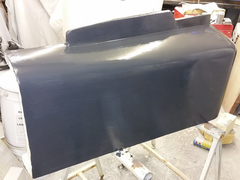
and now with a rough trim up drum roll the RH pod mould . dust an all
 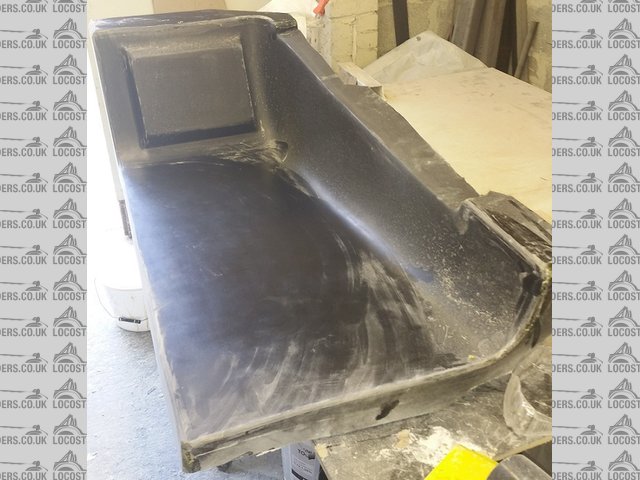
Description
ps: my original resin order turned up at 4.30 today !!!!!!! , would have just been in time but could not take the chance
pp***sss : also had some real fun with my face mask "TAKE NOTE" . brought a face mask with cartridges from a well known
supplier . I asked for dust protection and organic fumes.
well when using it for resin and paint I can still smell the stuff although not as bad as without the mask , the other night after feeling a bit tom
and dick after a resin session a sat down and read the code on the side off the supplied filters , cross referenced them on the interweb and it states
" dust only" no wonder I've been feeling ill after use.
went out yesterday and bought a proper dust and fumes mask - the difference is - did the moulding today with the new mask and what do you know no
smell no feeling ill !
motto of the story don't believe anyone check yourself !!!!!!!!
[Edited on 29/5/15 by bart]
BE ALERT > BRITAIN NEEDS LERTS
|
|
|
OliilO
|
| posted on 29/5/15 at 07:06 PM |
|
|
It's been interesting following your mould making progress. I ordered a resin infusion kit from easy composites this week with the intention of
taking moulds off some of my existing parts and making a few new ones before making some c.f. stuff. Looking forward to getting started now!
|
|
|
cloudy
|
| posted on 29/5/15 at 08:12 PM |
|
|
3M 4255 is a good organic and particle disposable mask - pretty cheap
www.warnercars.com
|
|
|
bart
|
| posted on 29/5/15 at 08:30 PM |
|
|
yep that's what I now have a 3m 4255
the original mask is good just had the wrong cartridges will still use it for dust and keep the 3m for resin and paint
BE ALERT > BRITAIN NEEDS LERTS
|
|
|
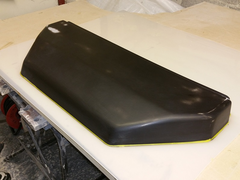
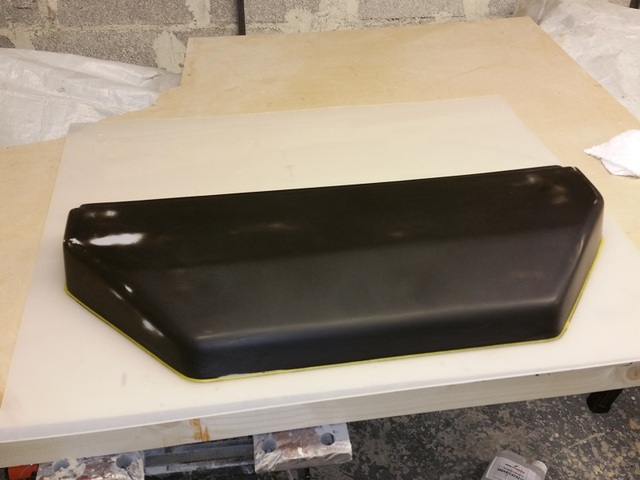
bart
|
| posted on 30/5/15 at 08:54 PM |
|
|
hi all
bit boring but I know some are following the process
so this afternoon and evening I trimmed the LH and RH side pod moulds
gave then a good scrub with 1200 wet and dry to get rid of any raised scratch marks
then gave each mould 6 coats of easy composite chemical mould release ( I should be on commission here ! )
then just for safety 1 coat of wax for insurance
gave them a coat of gel coat nice and thick as they are only temporary parts ( famous last words) for sizing
I have cut the fibre glass up ready for tomorrow morning I should be able to do both sides in an hour and a quarter.
then i'm then going to look at the front and side design again , when the parts have gone sticky ( about 3 hours ) ill probably stick them out
side so I can get the chassis out again ready for releasing the parts later tomorrow night.
cant wait to see the back and side pods together .
well here's hoping the parts come out of the mould !!!!
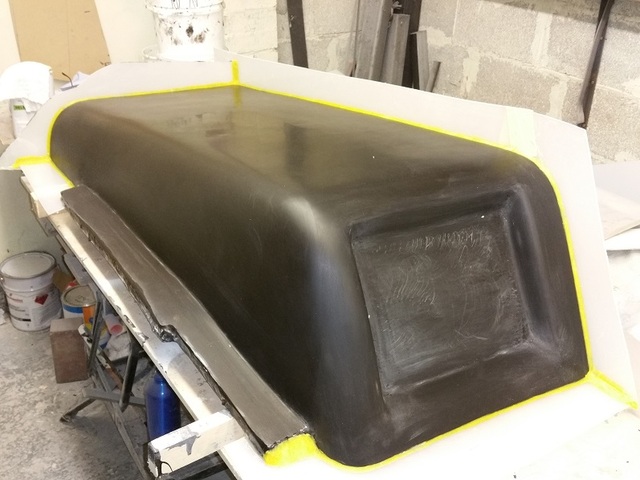
first pics rh side all cleaned up ready for gel coat
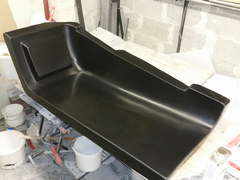 
Description
second pic is the lh side with gel coat on
Description
[Edited on 30/5/15 by bart]
BE ALERT > BRITAIN NEEDS LERTS
|
|
|
ceebmoj
|
| posted on 30/5/15 at 09:39 PM |
|
|
Looking forward to seeing them on the chassis.
|
|
|
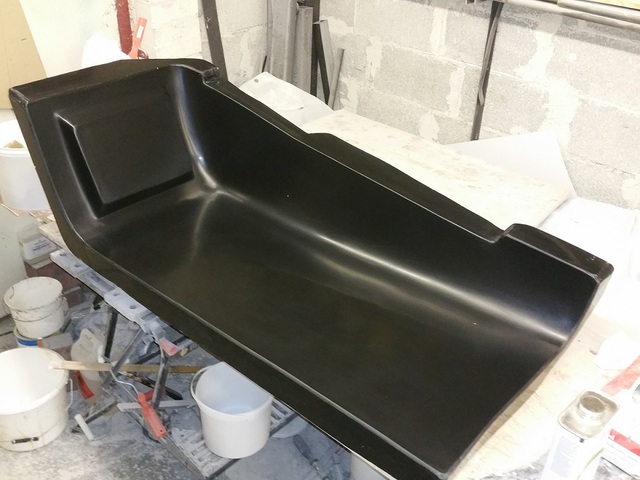
bart
|
| posted on 31/5/15 at 08:47 PM |
|
|
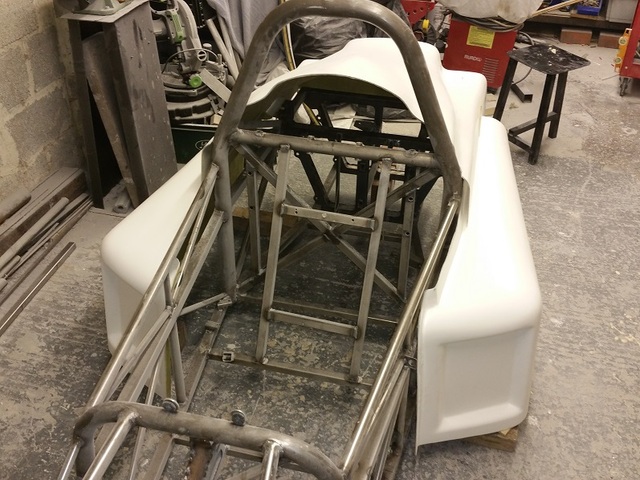
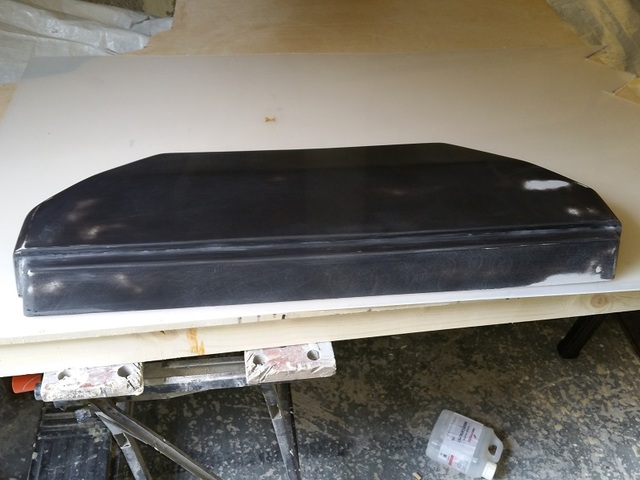
podtastic
hi all well I had a good day
got up late about 10.30 ( my excuse was it was cold wet and windy and the bed and wife was warm )
dashed out and laid the fibreglass (3 layers) in the first mould left that to go of for an hour
went and made some fantastic fried bread rolls
after brunch and tea went back out and laid the fibre glass in the second mould
retire to couch more tea and Sunday afternoon film.
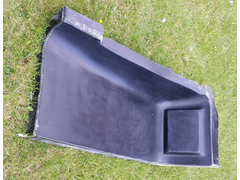
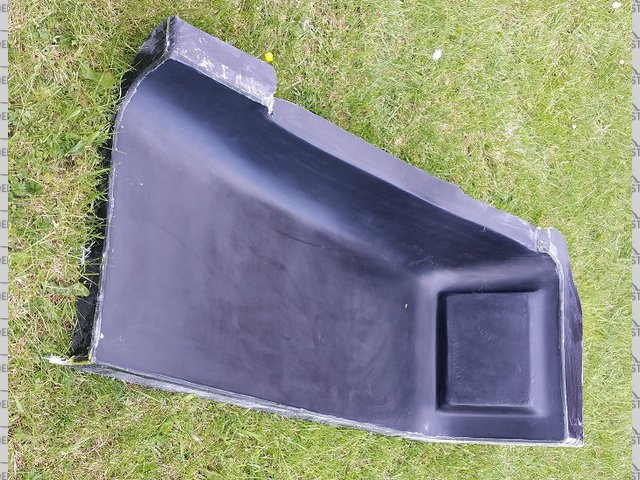
went back out about 5.30 and popped both parts out of the moulds " well pleased with the result.
put them outside in the sun to harden a bit more.
big clean up of garage
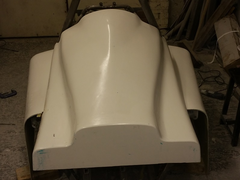
about 7 pm trimmed the 2 mouldings with a dremel then a small grinder.
at this point I was going to leave it for the day , but could not wait to see them on the chassis with the rear engine cover
so further clean up and get the chassis out from the side of the garage.
over the next hour I trimmed the rear engine cover for a rough fit up , not fully fitted and dressed yet but well on the way
as I said a good day
just out of the mould and untrimmed
 
Description
Description
side pods after a quick trim up , " short back and sides "
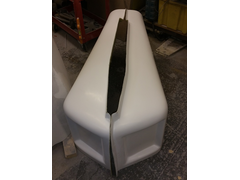 
Description
this pic is the pods in position but the rear cover is not trimmed and is 2" to high
Description
this is front and rear view with the top now trimmed
 
Description
 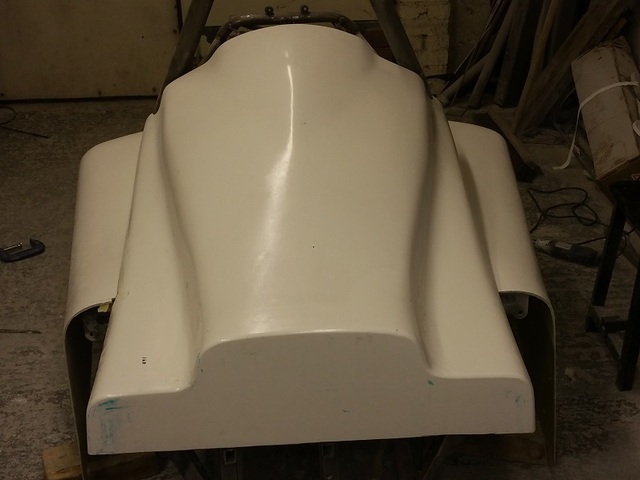
Description
finally bit out of sequence but side pod and rear engine cover roughly trimmed
the pods still need trimming to height about an 1" to come off the bottom of both
going to do that much later when fitted and mark it out with a height gauge from the floor
Description
BE ALERT > BRITAIN NEEDS LERTS
|
|
|
Rosco86
|
| posted on 31/5/15 at 09:29 PM |
|
|
You have cracked on, looking good now! Cant wait to see it all together!
|
|
|
wylliezx9r
|
| posted on 31/5/15 at 09:30 PM |
|
|
Looking good.
I spent a lot of money on booze, birds and fast cars. The rest I just squandered.
George Best
|
|
|
bart
|
| posted on 2/6/15 at 09:23 PM |
|
|
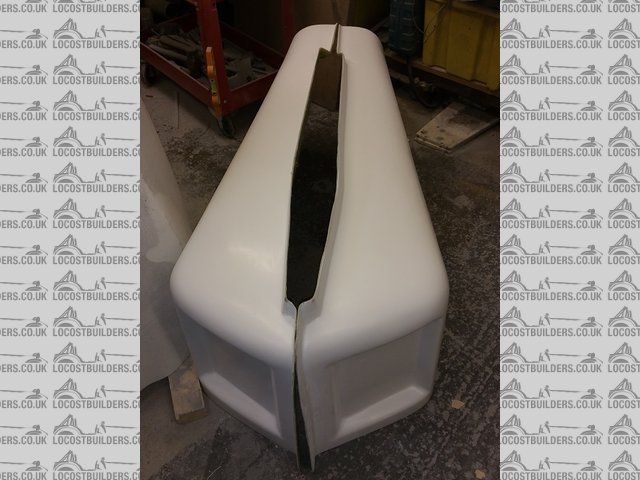
rear back panel
hi all
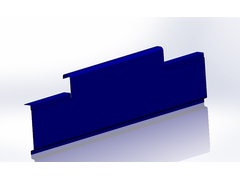
well tonight I decided to get on and design and make the rear lower panel that goes at the back under
the engine cover , ive include a design pic because I forgot to take a pic of the foam buck I made tonight
ive got to the stage of just covered it with a layer of fibreglass to give it some strength
tomorrow night I will final fill and sand with a view to getting it ready to make the mould on Thursday
also working on the side panel moulds ( well i'm giving it a lot of thought ! )
trying to get as much as possible done this week as I start a new job next week and it6s long hours through the summer
so I expect things will slow down considerably , not ideal but I have to buy food ect and I also need some more car vouchers for bits . picture shows
pockets for the fog and reverse light but these will be surface mounted
number plate goes in-between the lights , long thin front style.
could not get the rear type plate to look good.
 
Description
BE ALERT > BRITAIN NEEDS LERTS
|
|
|
bart
|
| posted on 5/6/15 at 01:27 PM |
|
|
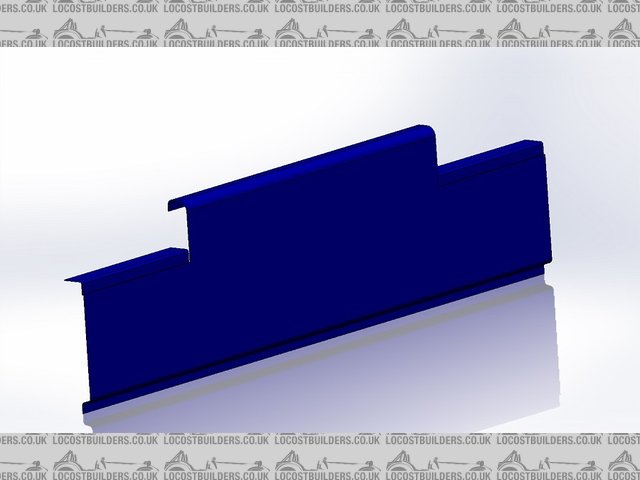
rear lower panel
hi all well i've steamed ahead and have finished the rear lower panel for the mould make.
I will try and get this mould done tonight ,should at least get the gel coat and coupling coat done today
I have also started the side panel mould , I have redesigned it so as one mould makes both sides lh and rh
I will have to alter the frame slightly but it makes for a better frame and one less mould I will post some more pics on this today or tomorrow.
original cad design
Description
what ive finished up with as stated before the lights will be surface mounted so no need for sunken holes
Description
Description
Description
BE ALERT > BRITAIN NEEDS LERTS
|
|
|
HowardB
|
| posted on 5/6/15 at 02:09 PM |
|
|
that is some rate of progress, this feed puts me in mind of the BBC shows with all the fab time lapse photography except in your case it is all in
real time,.....
well impressed!
Howard
Fisher Fury was 2000 Zetec - now a 1600 (it Lives again and goes zoom)
|
|
|
bart
|
| posted on 6/6/15 at 07:29 AM |
|
|
front nose cone ????? any one
hi all
i'm on the scrounge
need to borrow a front nose cone to off up to my car for size
it wont get marked or scratched and I will pick up and deliver back safely
no particular make required
so can anyone in the north west help me out preferably in the Liverpool Manchester corridor please but any where north west will do
ps : it can be old and cracked it don't matter .
regards Gary ( Bart )
BE ALERT > BRITAIN NEEDS LERTS
|
|
|
bart
|
| posted on 6/6/15 at 05:52 PM |
|
|
finish of rear panel
hi all
got out at 9.0am this morning and put the backing coats on the rear lower panel mould
got five layers of fibreglass on in one go as it was cold and I wanted the extra layer to help with going off
got a bit worried as it took 3 hours to even go tacky , but all was ok in the end
took it off the buck after 4 hours
gel coated
Description
rear of finished mould trimmed round the edge
Description
2 inner mould pics still dusty and with some wax on as just of the buck
Description
Description
I will leave this for 24 hours to harden off fully and get rid of some of the styrene.
BE ALERT > BRITAIN NEEDS LERTS
|
|
|
bart
|
| posted on 6/6/15 at 06:05 PM |
|
|
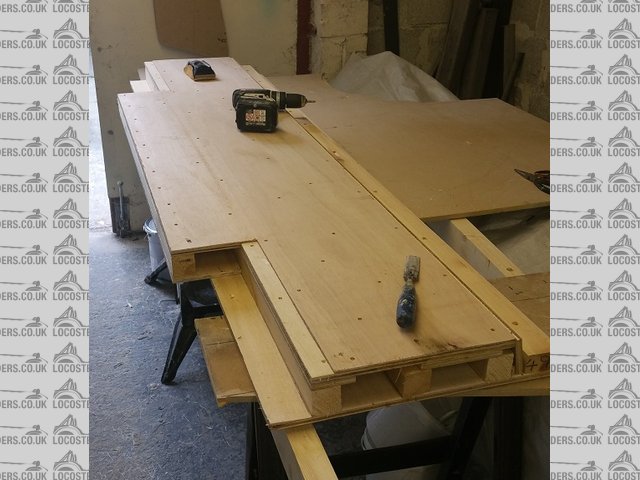
side panel design and make
second post of the day so hi again !.
these next few posts will be regarding the side panel
first I had a look at the design of the side panel and by altering the design of the chassis slightly
I came up with a design that6 could be used on both sides so one mould only required.
basically I use the left hand side of the mould for one side and the rh side for the other side of the car
the middle section is common.
this is the design I came up with
Description
so I have constructed the buck mainly from plywood this time with no foam as the other moulds.
I used this construction so as to make flat surfaces relatively easy.
I used 4mm ply as the final skin so that the panel steps were easy to get , hopefully the pics show this
basic panel construction
Description
closer pic showing the panel step that I require
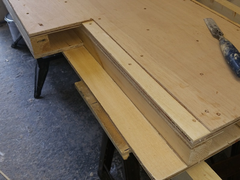 
Description
last pic of the day , as I'm kna----d ( very tired ! )
this pic shows capped of ends some basic filling and top edge rounded off
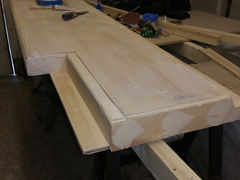 
Description
tomorrow need to form the bottom step and round of the back of the panel
then ill give it a coat of fibre glass resin to seal the surface , then a coat of gel coat so I can see any problems and differences
BE ALERT > BRITAIN NEEDS LERTS
|
|
|