bart
|
| posted on 10/6/15 at 08:55 PM |

|
|
hi all
bit of a slow down now as I only get 1hr per night on the car
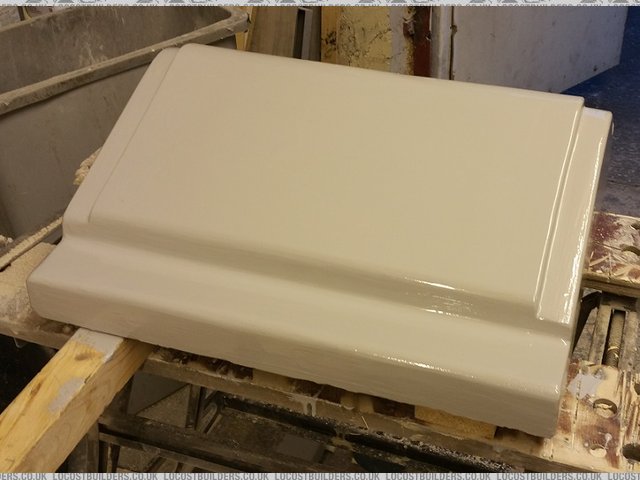
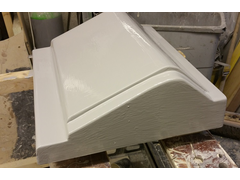
I have sanded the wooden buck to size and form and in the pics below they have the first 2 sealing coats on.
when dry tomorrow I shall sand down with 120 grit to get a good finish and the progressively down to 1200 grit
will probably need another coat or 2 but we shall see after the first flat sanding.
Description
Description
Description
if I can keep awake I will design the front side panel tonight that goes over the front suspension mount points and locates the front nose.
hopefully the plan is to get all the body work moulds finished by the end of July . then its on to learn carbon fibre infusion technique's
BE ALERT > BRITAIN NEEDS LERTS
|
|
|
|
|
bart
|
| posted on 13/6/15 at 07:14 PM |
|
|
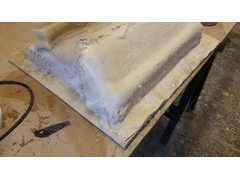
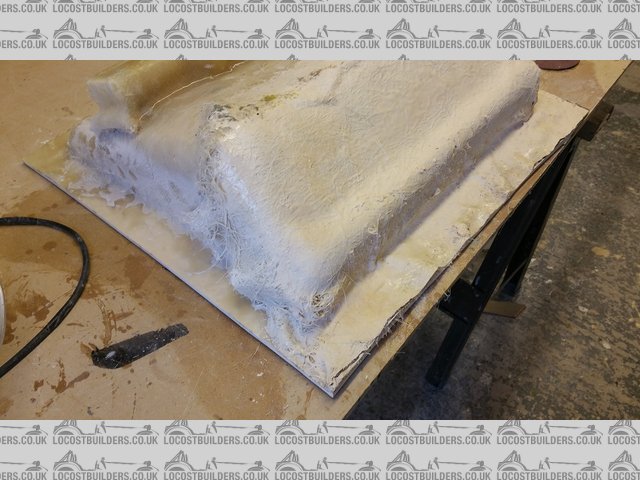
hi all
I have finished the side wall buck and have included 2 pics for interest
this mould requires 1 split line so the pics show the first split line
from the pics you can see the plastic surround and location pips straight out of the easy composites video
ceebmoj came round for a chat today about his body work plans so all the best to for his work.
hope all goes well
Description
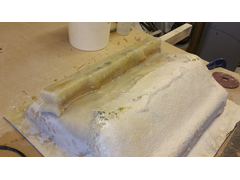
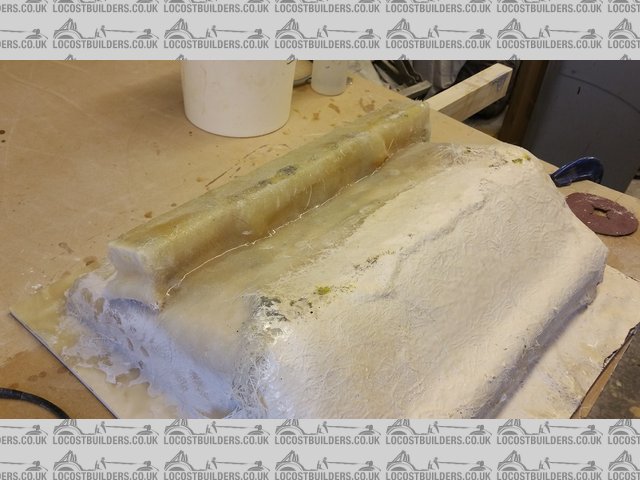
and a close up of a location pip as per easy composite video
Description
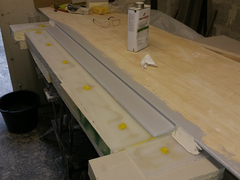
as I post this its 8:20 pm and the second release coat has just go on . looking to get gel coat * 2 and a coupling coat on tonight if possible lets
see. if I can then I can get the mould back done 7:30 am and let it go off while I go out for a squirrel day
I can the flip the buck tomorrow night and start on the face side
[Edited on 13/6/15 by bart]
BE ALERT > BRITAIN NEEDS LERTS
|
|
|
bart
|
| posted on 14/6/15 at 02:53 PM |
|
|
hi all
well managed to get the gel coat and the coupling coat on the reverse split side last night
got up at 8am and completed the backing 5 coats this morning
about 1pm I decided it had all gone off enough so I turned the buck over and removed the split line plastics and backup
leaving the mould in place
you will notice that I went well outside the prepped area on the rear face this was so that the rear split mould would remain firmly
attached to the buck and when the front is finished I will simply put a grind line in the correct place to remove it.
I am now working on the front face and waiting for release chemical's to dry so thought id post in-between.
first pic shows all the location pips and surface before moulding.
Description
next shows rear moulded area with "sticky to buck area in black"
Description
this pick shows buck turned over and plastics and wax sort of removed ready for clean up
Description
Description
close up of location hole and slit line prior to trim up with cutter grinder
Description
all cleaned up ready for top moulding
Description
Description
[Edited on 14/6/15 by bart]
BE ALERT > BRITAIN NEEDS LERTS
|
|
|
bart
|
| posted on 14/6/15 at 05:47 PM |
|
|
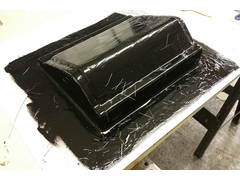
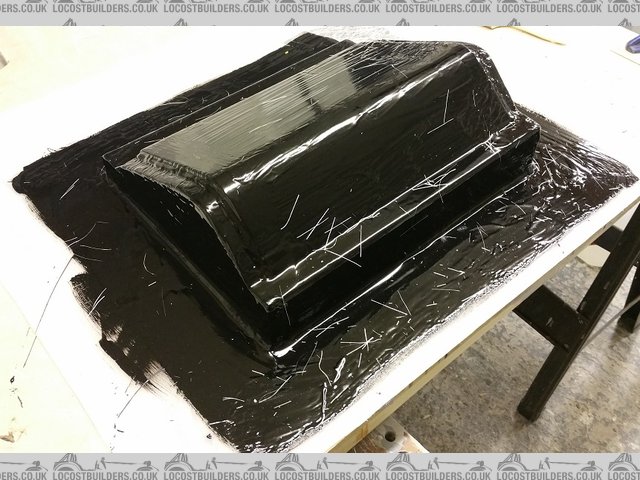
SLAP IT ON
slap on a bit o gel coat liberally

 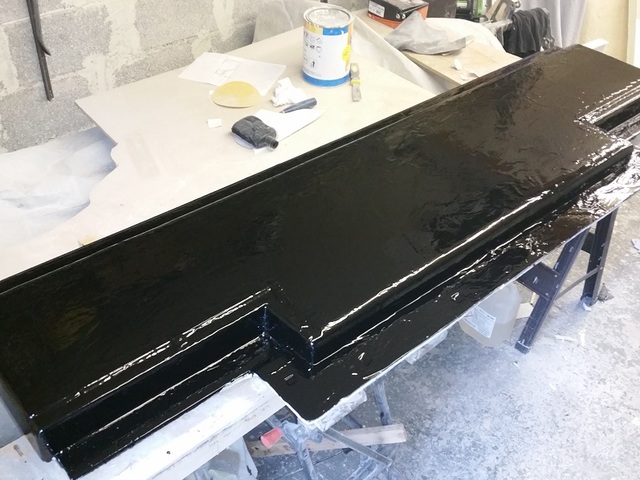
Description
BE ALERT > BRITAIN NEEDS LERTS
|
|
|
bart
|
| posted on 15/6/15 at 09:30 PM |
|
|
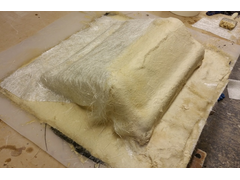
well hi all not much to post tonight
rushed home from work and got ready to layup the backing coat for the side panel buck tomorrow
then thought oh what the h--l I'll do it tonight
so had to cups of strong booster tea and got down to it
this was by far the most hard work mould I have had to do .
but there again it is 3 square meters in total
got four layer in most places and five in some where possible
if any one wants to know in materials alone this mould has coast £250 easily probably nearer £350
and lots of hard work
just hoping it all comes out ok tomorrow night and the split line works !
now I need to save some car vouchers for some more uni mould resin £147 + vat + carriage for 25 kg and I used 20 kg 0n this mould alone that's
without gel coat and coupling coat . not moaning just for information for the people interested.
if it comes apart ill post tomorrow , if not you will hear a loud sobbing sound coming from Manchester way !
 
Description
BE ALERT > BRITAIN NEEDS LERTS
|
|
|
bart
|
| posted on 16/6/15 at 08:26 PM |
|
|
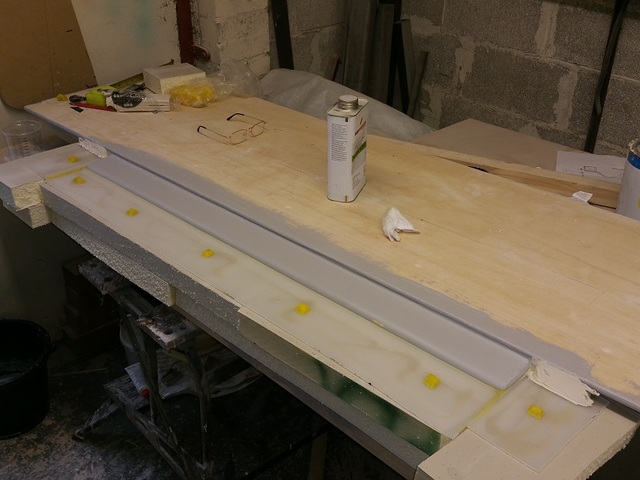
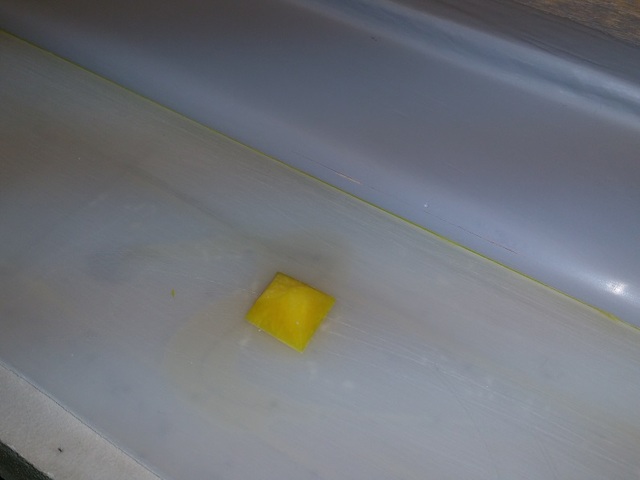
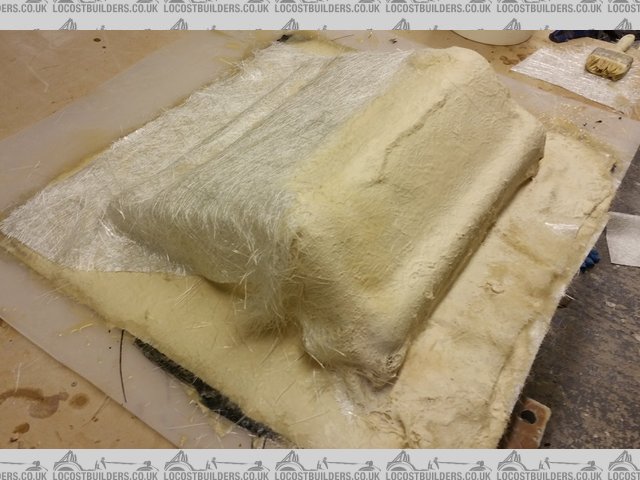
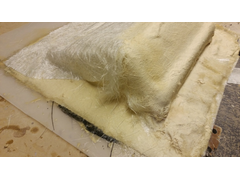
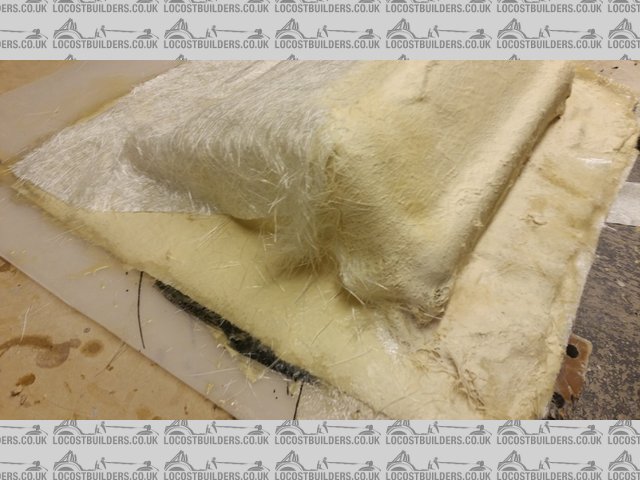
ello ello
ello ello
well it came out off the buck easy and the split part looks good and fits good as well
pics are with a basic clean up from last night. only spent 45 mins on it tonight bit tired so bath and bed tonight.
at least I know its off the mould
big clean up tomorrow , dust resin and fibre class every where.
then probably a big contemplation tea to decide what to do next.
ps: the easy composite location pips work a treat.
have to say they are not the cheapest but there stuff works every time.
highly recommend there easy release , if you consider the surface area of this mould it just almost fell off.
Description
pic showing location pips
Description
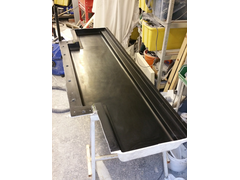
pic showing split line rear of mould
Description
reap slit half back in place
Description
BE ALERT > BRITAIN NEEDS LERTS
|
|
|
ceebmoj
|
| posted on 16/6/15 at 10:35 PM |
|
|
Looks great, As I mentioned at the weekend you are flying along. I wish that I had made as much progress as you.
|
|
|
bart
|
| posted on 18/6/15 at 08:34 PM |
|
|
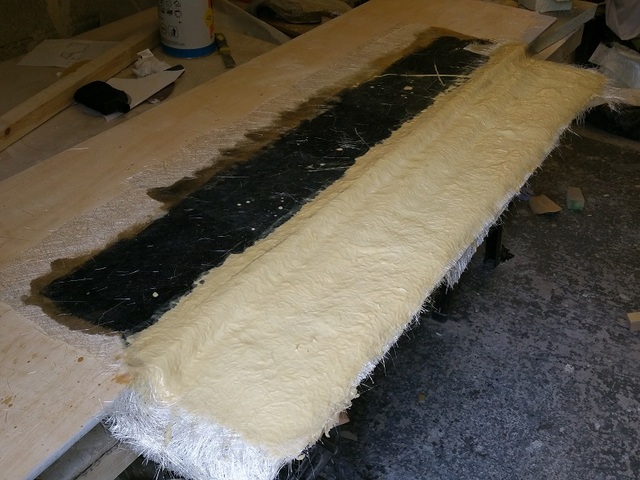
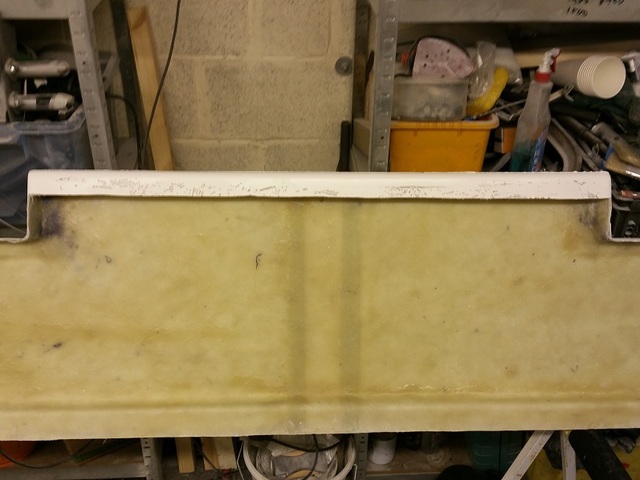
cross section view
hi all
still having some squirrel days but did go outside to my ever increasing pile of discarded old bucks and cut the end
of the side panel buck as I intend to re-use this part and modify it to make the front side panel that covers the suspension anchor points and
provides an anchor for the front nose cone .
thought this pic may be of interest to some as it clearly shows how I constructed the layers and structure for the side panel buck
sort of a real life cross section
 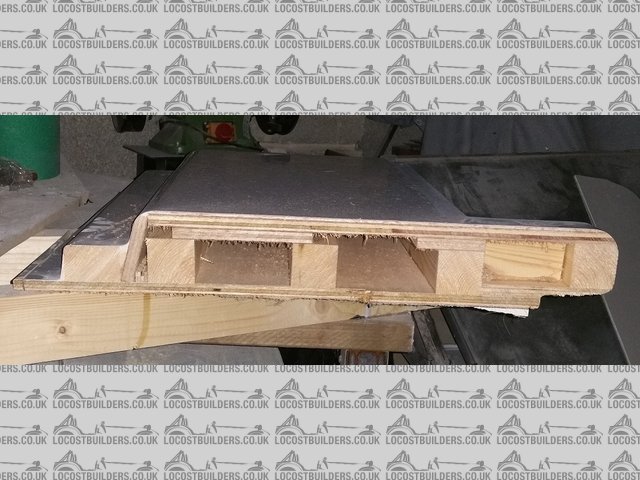
Description
BE ALERT > BRITAIN NEEDS LERTS
|
|
|
OliilO
|
| posted on 18/6/15 at 08:50 PM |
|
|
What do you use as a sealing coat on the buck? I'm going to start making up a side panel buck and mould soon.
|
|
|
bart
|
| posted on 18/6/15 at 10:40 PM |
|
|
In this case because the volume of the shape is wood and solid I coated the shape with 2 thick coats of white gel coat . I flatted this down then
applied 2 coats of a mixture of 50% gel 50% polyester resin . And some black pigment. Much cheaper than using easy compasite mould coat and just as
good. P's I think my poly resin has wax in it to make the air side go hard. If yours don't use 2% wax added . Then I sanded down to 2000
grit
BE ALERT > BRITAIN NEEDS LERTS
|
|
|
bart
|
| posted on 20/6/15 at 03:41 PM |
|
|
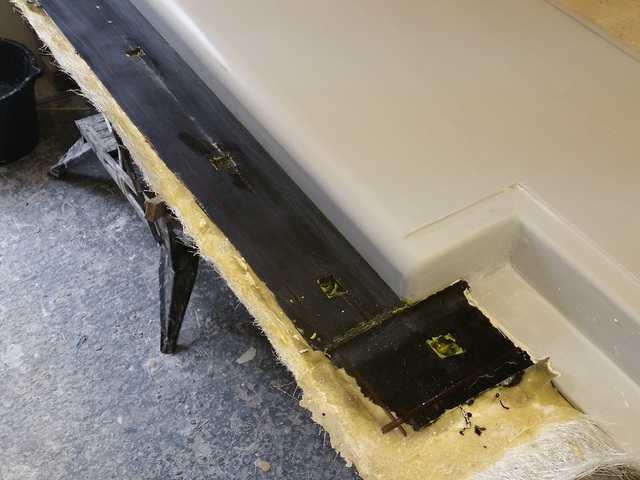
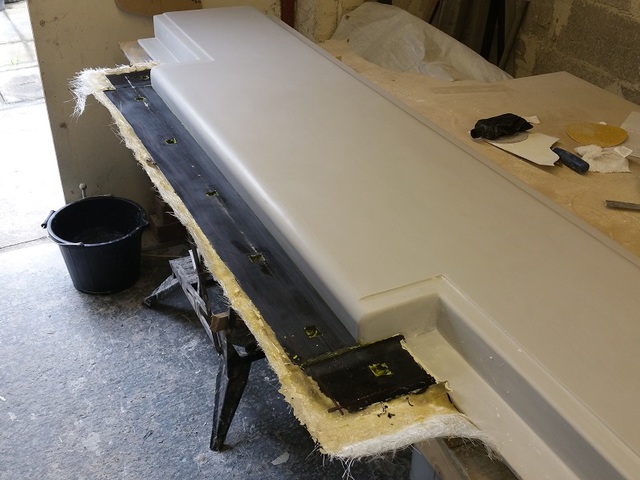
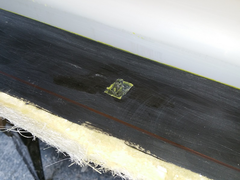
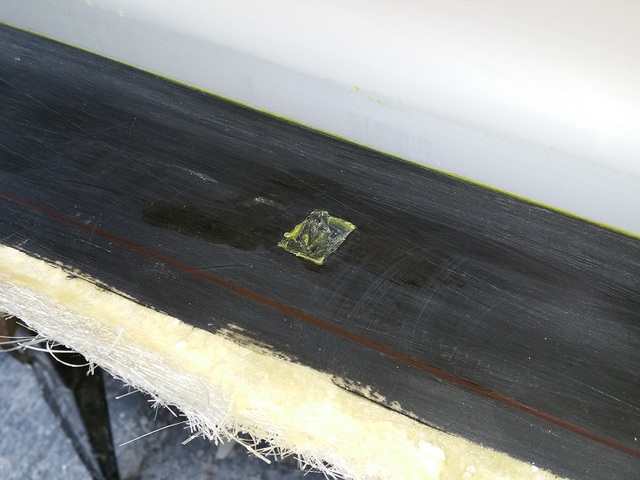
leach through
hi all
spotted a problem that I should point out
ref: side panel mould
this mould as stated was all wood construction and had no covering of fibreglass just 4 thick coats of resin
looks like when I came to tidy up the mould and close inspection that I got a leach through where the layers of plywood are.
these lines where defo not present before I covered the buck so must have been draw through by the mould gel coat . not a disaster but worth pointing
out. most have rubbed out the rest can be dressed in the part due to painting , think I would advice to put a layer of 450 gm chopped strand on the
mould buck before rubbing and filling to act as a further barrier.
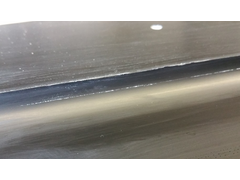 
Description
BE ALERT > BRITAIN NEEDS LERTS
|
|
|
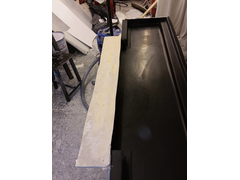
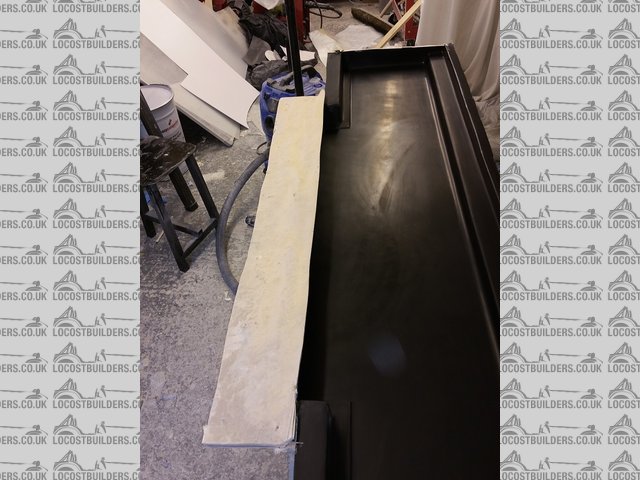
bart
|
| posted on 21/6/15 at 08:38 PM |
|
|
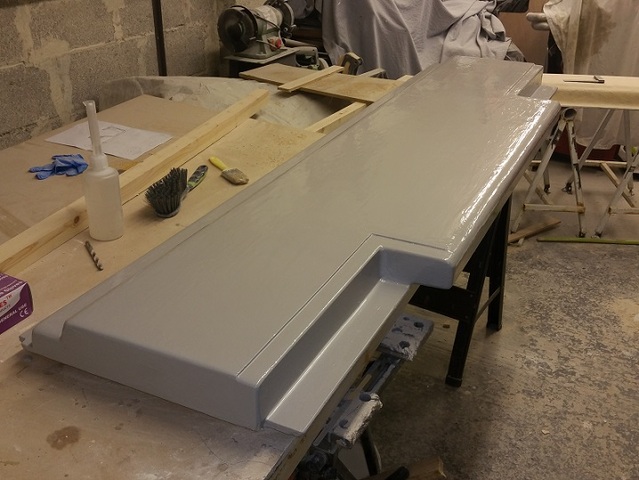
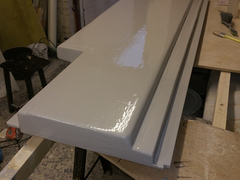
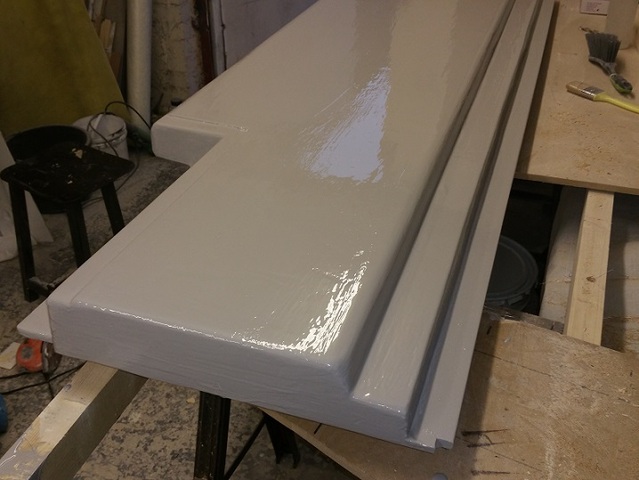
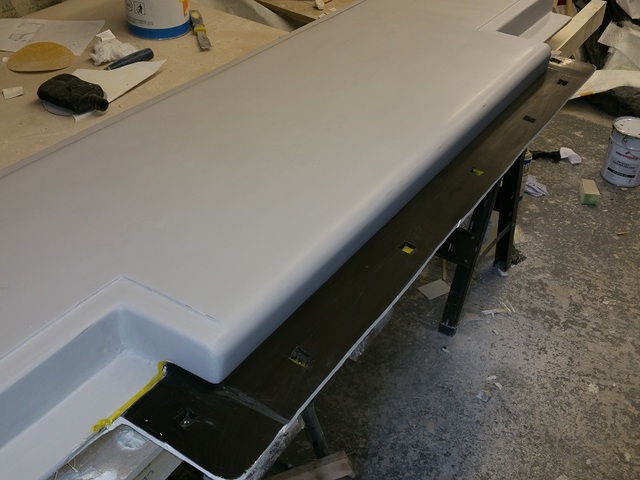
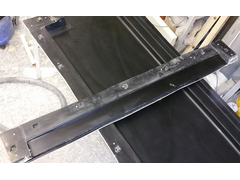
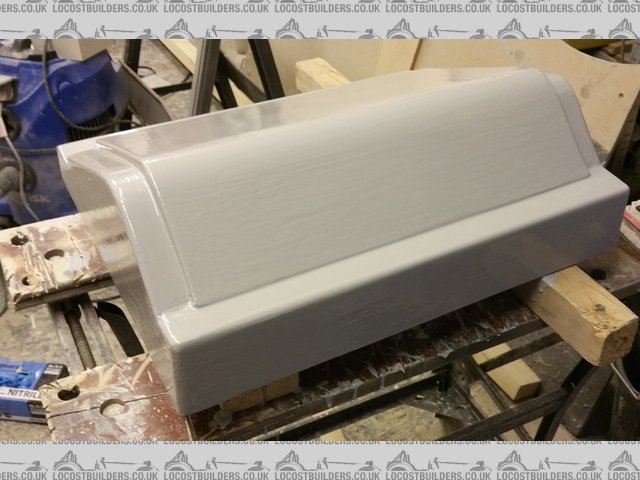
rear panel and static shock !!!!
hi all
well had a few days off , I was exhausted what with a new job and working in the evenings on the side panel buck.
more on the side panel in the next post
first the rear panel
spent several hours this week end making temporary fit up panels from the moulds I had made over the last few weeks
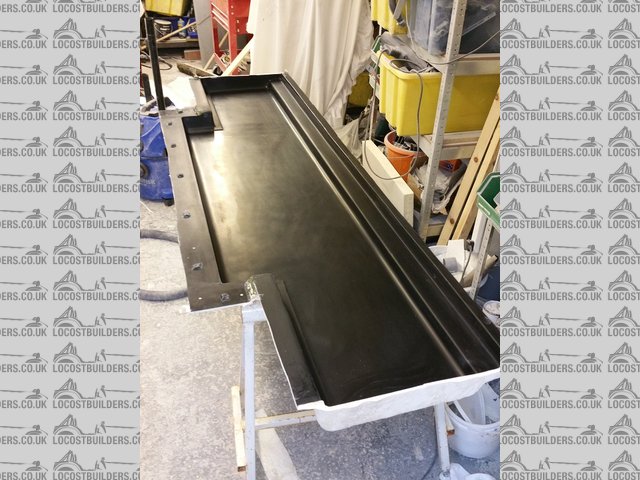
first the rear panel , nothing to report ( unlike the side panel more later ) just pics of the trimmed moulded panel as usual almost fell out of the
mould.
Description
Description
Description
ps: word of warning , if you want to get spectacular static electric shocks do the following .
hold and use a dremel cut off blade in one hand and hold your nylon vacuum cleaner nossel about 1" from the cutter whilst both running RESULT
!!!! got three before I realised what was causing it LOL DOH i'm thick you see !
BE ALERT > BRITAIN NEEDS LERTS
|
|
|
bart
|
| posted on 28/6/15 at 11:10 AM |
|
|
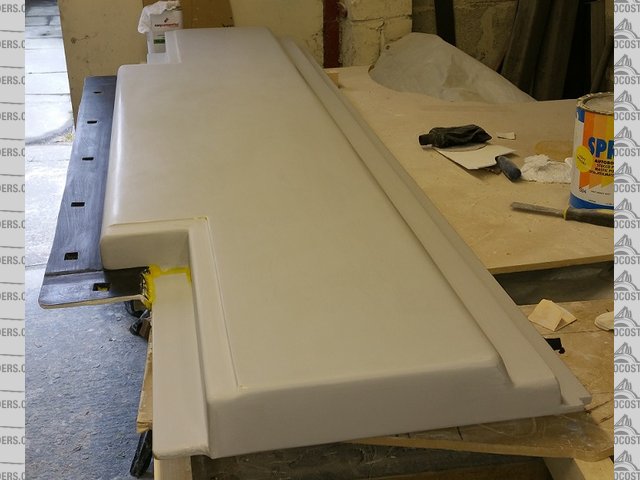
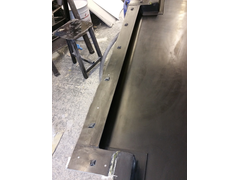
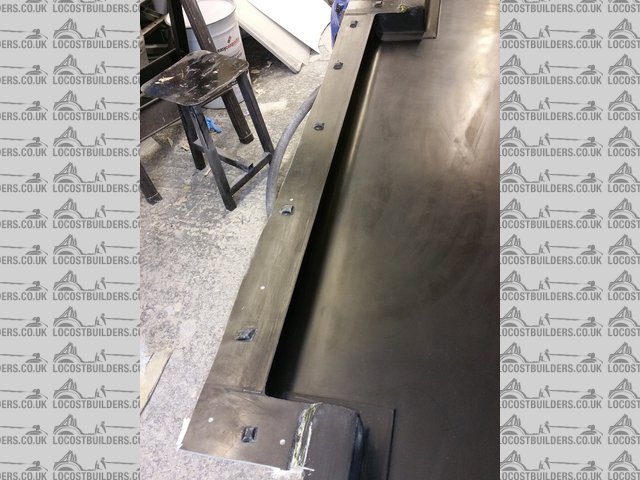
side panel woes
hi all
well this is a late post , I actually made the first side panel from the moulds last weekend , but have not had the time to post
Its not a disaster but the return edge at the top is near impossible to mould using conventional layup methods. I managed to get a very rough moulding
for fit up trials which is what the panels are for but I will need to modify the mould for further use.
having said all that when I make the proper car panels they will be vacuum bagged which will be a lot better but I still need to modify the moulds to
make sticky down areas for vacuum seal. I also need to make some more clamp holes nearer the split line to improve that area.
any how i'm on with the front suspension infill panel which when finished will allow me to make the front nose cone and front bonnet . will take
some pics later as i'm just going to Glasgow to watch AC-DC.
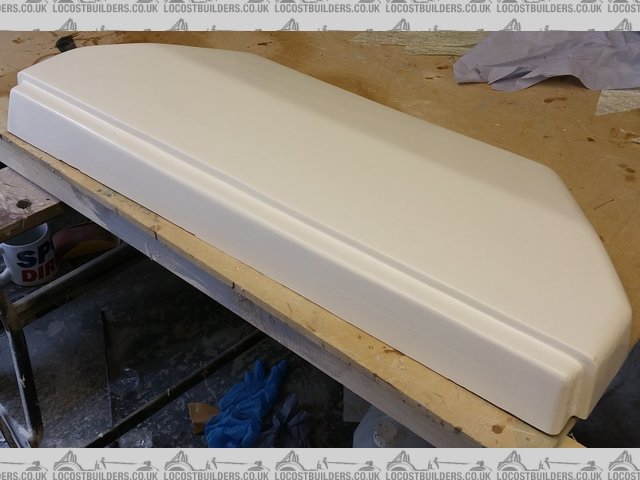
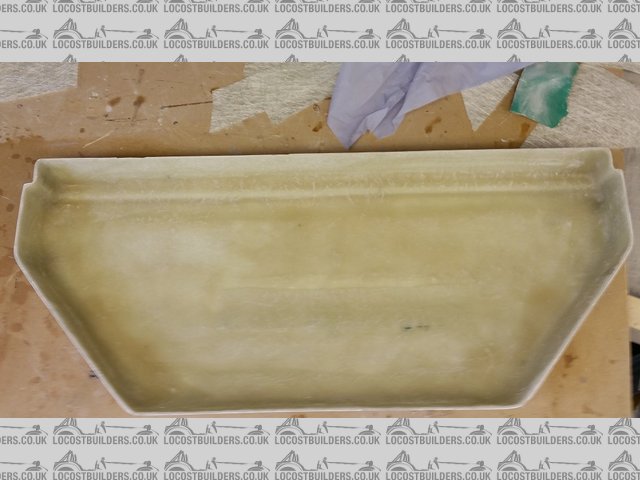
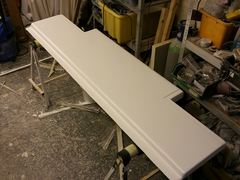
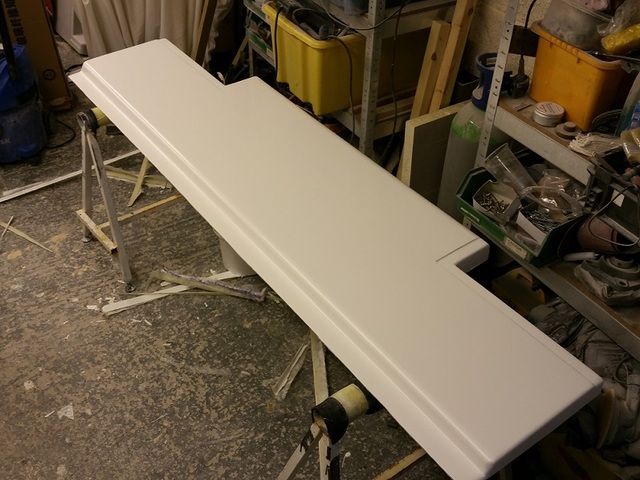
finished first side moulding
Description
Description
the trouble some return top edge ,
Description
BE ALERT > BRITAIN NEEDS LERTS
|
|
|
bart
|
| posted on 29/6/15 at 09:07 PM |
|
|
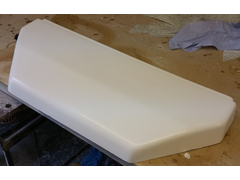
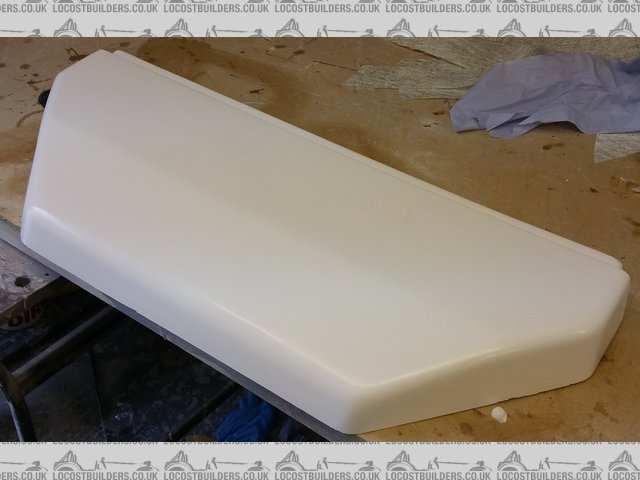
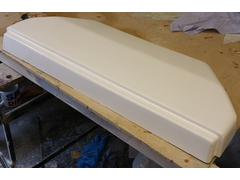
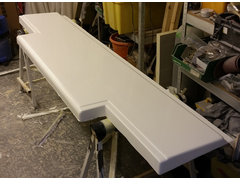
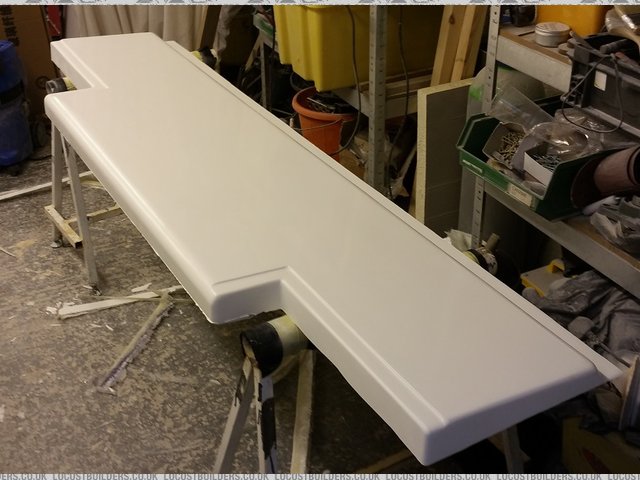
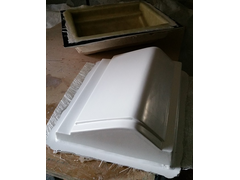
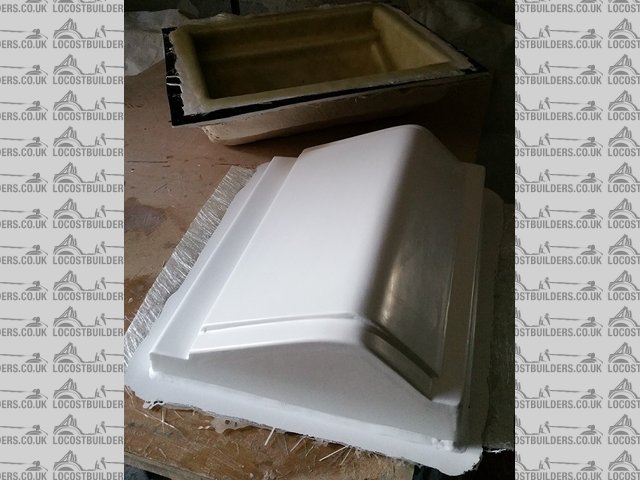
front side panel suspension infill
hi all started work on my front suspension side panel infill
again this is both LH and RH
started with my front half of the side panel mould chopped off
added some angled bits to cover the suspension made from ply , wood , glue , sticky back plastic , you name it its in there.
covered in half a big tin of body filler strategically placed rubbed down and have just got to the first coat of cover gel
tomorrow I will rub down change any bits I don't like then 3 more coats of tooling gel ( actually its my own concoction ) . then rub it all down
stick to plastic sheet and tool up.
aiming for end of the week tool finish .
will see how it goes got about 10 hours into it so far.
Description
top view
Description
bottom view
Description
side profile view
BE ALERT > BRITAIN NEEDS LERTS
|
|
|
ceebmoj
|
| posted on 30/6/15 at 07:51 PM |
|
|
What is the tooling gel made up of? I think you said microsphears, pigment and resin. How does it build and sand compaired to the of the self
products?
|
|
|
bart
|
| posted on 30/6/15 at 09:10 PM |
|
|
my secrete recipe's
ah ha
after my secrete recipe's are you
I have 2 both for building the surface of a buck
No1 50% polyester gel 50% polyester resin use 2% hardener , this gives a coat not as thick as gel easy to rub down and resilient .
I use premixed white gel for fibresuplies Southport with a kitchen knife full of black pigment to add some dark colour for contrast.
No2 50% polyester resin 50% fillite balls use 1.5% hardener ( total volume ), this gives a thick cement type coat easy to rub down . good for
"free hand design" with a kitchen knife full of black pigment to add some dark colour for contrast. on a flat surface this can go on
1/2" thick or more 2 -3 mm on vertical
"to all this add salt and pepper to taste and a dash of tabasco source"
BE ALERT > BRITAIN NEEDS LERTS
|
|
|
bart
|
| posted on 3/7/15 at 09:36 PM |
|
|
hi all , nice weather , hot , f hot , cold , warm , hot
just a pic of the front suspension infill panel , gel coated ready for 100g fibre layer as intermediate .
will do full mould first thing tomorrow then leave to dry whilst having a squirrel day .
ps: come on LH
Description
BE ALERT > BRITAIN NEEDS LERTS
|
|
|
ceebmoj
|
| posted on 3/7/15 at 11:25 PM |
|
|
Hi, i was reading through the Uni mould documentation and cant find details of how much you let the coupeling coat go off. What are you doing?
|
|
|
bart
|
| posted on 4/7/15 at 12:28 AM |
|
|
7 or 8 hrs minimum
Max 48hrs
Apparently acording to easy tech bloke you can leave it longer but you have to sand prep it and wipe with acetone if longer than 48 hrs
BE ALERT > BRITAIN NEEDS LERTS
|
|
|
bart
|
| posted on 4/7/15 at 10:44 AM |
|
|
warning east coast optimould
well a word of extreme caution today
easy composite's was out of uni mould
so I went to east coast fibreglass for there opti mould system
from reading its probably the same stuff !*!*! ( looks and smells the same )
easy mix ratio is .75% to 1.5%
east coast is 2% ??????
well well well
small or may be large disaster
first so far with the easy uni mould system, I have now done 6 or 7 moulds
easy to work with allows you to get the 4 or 5 layers on without a problem then goes off ok
east coast disaster
1/3 of the way through the 5th layer the resin went off in a 10second period I now have a 1/3 saturated 5th layer sticking
up all over the place half stuck down half not
fin disaster no warning just bang your "f-----d"
and no to your reply's
I did mix it very accurately
it was the correct temperature for buck and resin and no I wasn't taking my time I can get 5 layers down in 20mins
all I can hope is , that the mould is ok and I can stick the loose stuff down with ordinary poly resin
happy day's aahhhhhhh !
Description
Description
what a mess !
stick to easy composite's uni mould it works
BE ALERT > BRITAIN NEEDS LERTS
|
|
|
bart
|
| posted on 4/7/15 at 08:18 PM |
|
|
more problems
hi all
been a trouble at tut mill !
first as per previous post the tooling resin did a nose dive
well mostly got round that , covered all the loose material in ordinary resin
added a support rib so that I could turn the finished mould up side down to work with
Description
Description
well then the trouble at mill part deux !
I did a silly thing I went shopping came back had some dinner then fell asleep on the couch
result the tooling went rock hard.
now normally that don't matter but this was a particularly solid buck and the mould is also solid. ie no flex
result I could not get any wedges in to get the buck out . I tried every thing !
so cup o thinking tea and out with a 1" sharp chisel
I had to chip the inside off the buck away bit by fing bit
2 and 1/2 hours later and lots of sweaty work I finally managed to get it out
it was not chemically looked it was not mechanically looked.
it was I could not get at the seams to wedge it out.
that's why I normally get the buck out whilst its still a little green with some flex
still its been one of them days !
 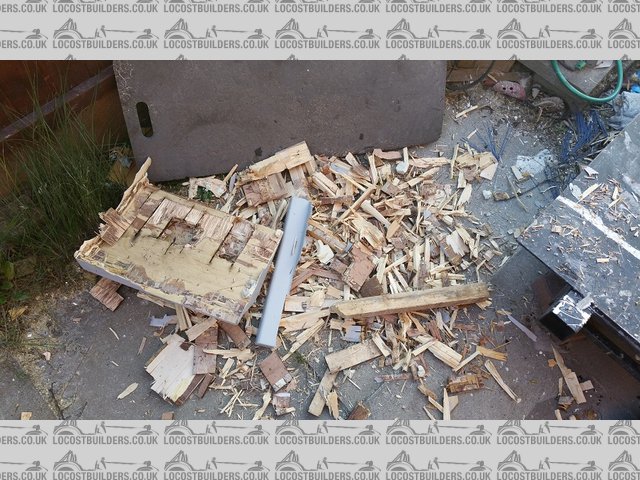
Description
all chipped out !
finished mould to be cleaned up
Description
[Edited on 4/7/15 by bart]
BE ALERT > BRITAIN NEEDS LERTS
|
|
|
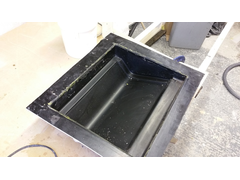
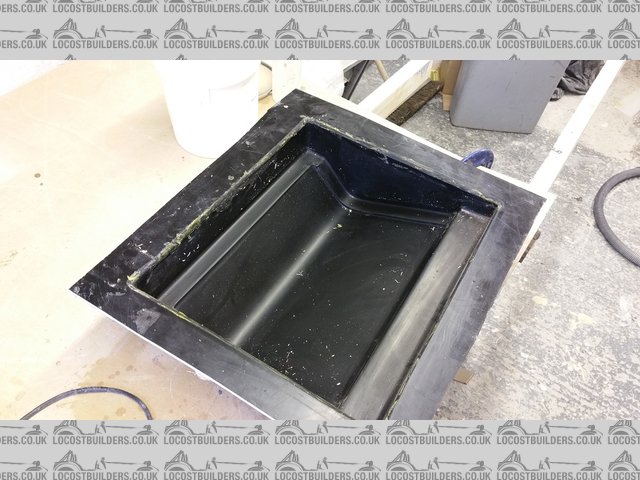
bart
|
| posted on 6/7/15 at 10:04 PM |
|
|
hi all
well it all sort of worked out in the end
all cleaned up and got some moulding out
pic shows one out and one in the bed "cooking"
Description
now on to the front nose cone probably the most difficult to do.
first I have to alter the chassis so will keep you updated as to progress
need to do some welding, so I have to hoover the whole garage first to stop it going up in flames.
if we can get some nice weather might lift the frame outside and do the mods. "the safer option"
BE ALERT > BRITAIN NEEDS LERTS
|
|
|
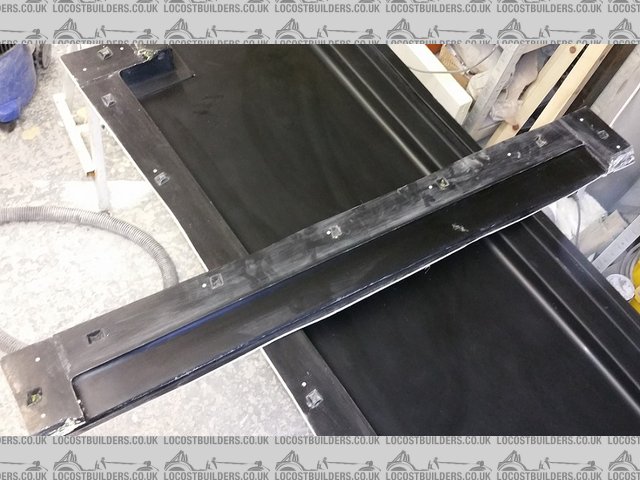
bart
|
| posted on 12/7/15 at 08:48 PM |
|
|
hi been a slow week on the car
no work at all during the week to busy at work
yesterday went to Cummings factory for there 50Th open day
had a big clear up today and a big garden day ( more of a hack )
anyway got the chassis out tonight and temp fitted the front suspension cover
need to fit the other side then work out what I am going to do for front nose cone
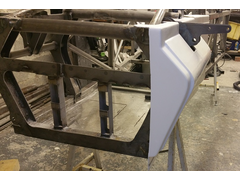 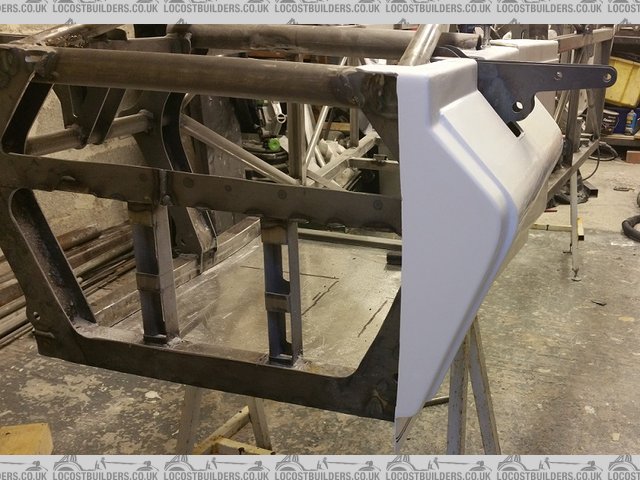
Description
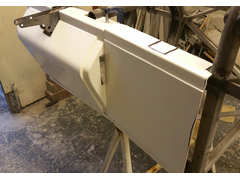 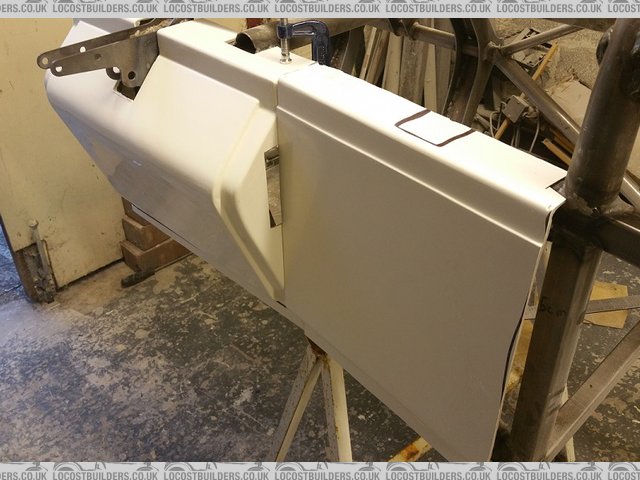
Description
BE ALERT > BRITAIN NEEDS LERTS
|
|
|
Rosco86
|
| posted on 19/7/15 at 06:14 AM |
|
|
Looking good mate, have you decided on a colour yet?
can't tell who's going to be finished first at this rate, when are you hoping for?
My Build Thread
|
|
|
big_wasa
|
| posted on 19/7/15 at 08:50 AM |
|
|
Looks great.
|
|
|