bart
|
| posted on 1/4/15 at 09:07 AM |

|
|
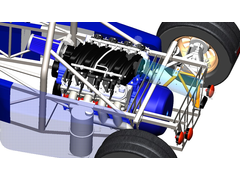
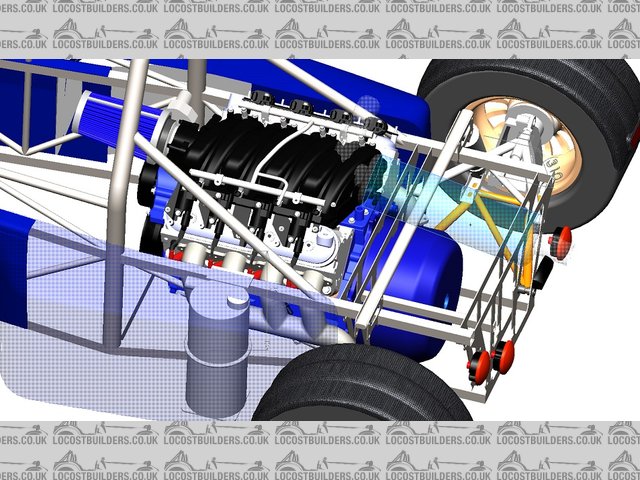
intresting diversion chevy engine
hi all
body progress slow due to work
but!
you know when your tired and you have taken to surfing the net
well found on grabcad , a 3d model of a Chevy ls3 engine which apart from the sump is the same approximate dimensions to a LS7 engine 500 bhp and
600bhp easy to obtain !
so like you do I down loaded it and put it in my chassis
well what do you know "it fits"
just food for thought !
now where did I put that transaxle ? LOL
ps not an April fools joke it does fit !
Description
BE ALERT > BRITAIN NEEDS LERTS
|
|
|
|
|
Ugg10
|
| posted on 1/4/15 at 10:10 AM |
|
|
Go on do it !!!!
I think there is an offshoot of Deronda that use an LS1 in their US spec car with a slightly longer chassis.
IMO the LS3 is a bit of a bargain, looking at new crate prices you can get a 480hp kit for around half the price of an LS7. For transaxles look at the
usual porker g50 upside down or the Audi 01E both used in Ultimas/GT40's.
---------------------------------------------------------------
1968 Ford Anglia 105e, 1.7 Zetec SE, Mk2 Escort Workd Cup front end, 5 link rear
Build Blog - http://Anglia1968.weebly.com
|
|
|
bart
|
| posted on 7/4/15 at 04:05 PM |
|
|
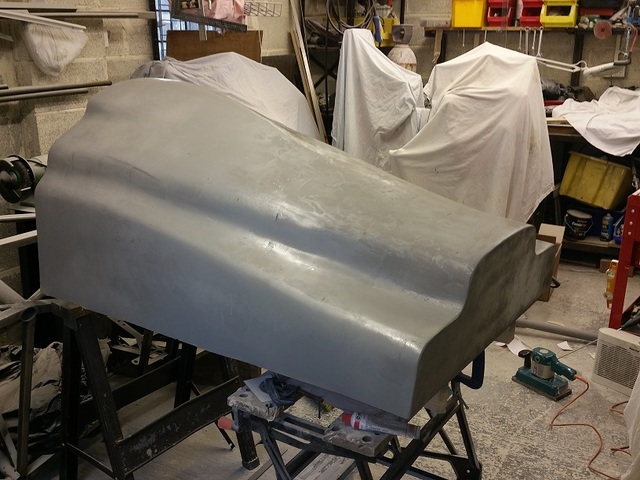
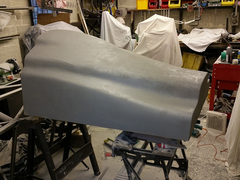
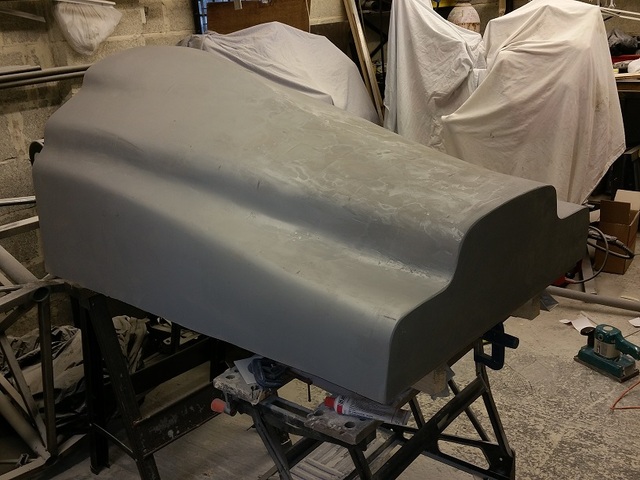
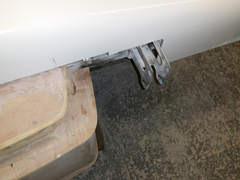
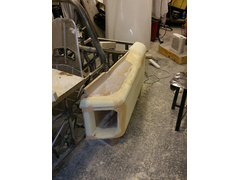
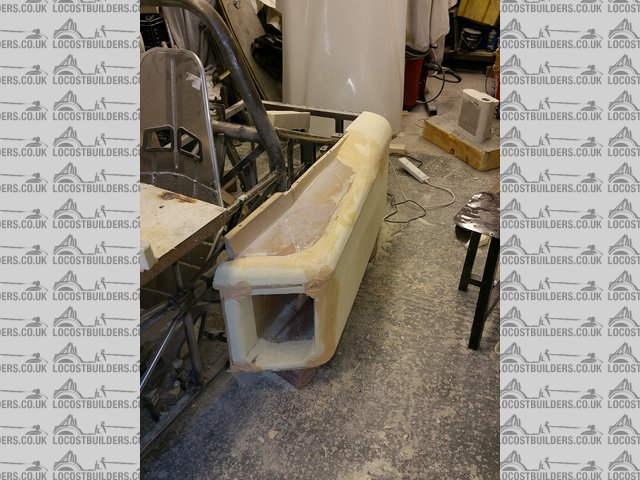
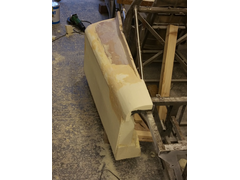
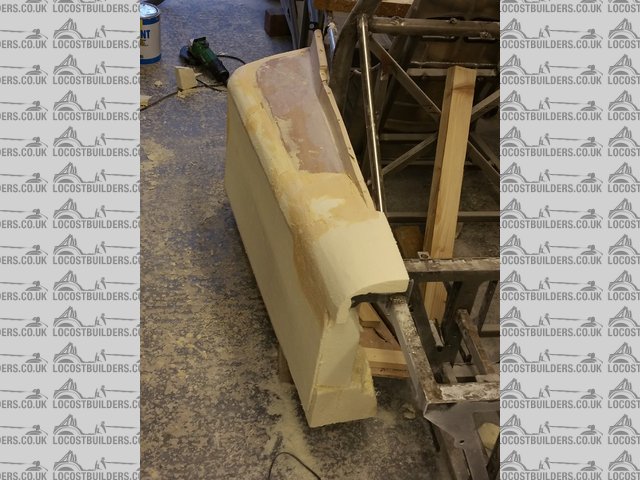
ready to resin the back
hi all been a while !
getting very close to finishing the back end plug
pictures look worse than it is as taken when primer coat was half wet half dry
since pics have filled a bit more and have now ordered the resin coat which will give a hard surface to work from
at the moment think I have reached the point where I am doing more damage than going forward
whilst doing the endless hours of sanding have had some interesting thoughts on an ultimate single seat road/race car will start a new thread for
comments.
Description
Description
Description
[Edited on 7/4/15 by bart]
BE ALERT > BRITAIN NEEDS LERTS
|
|
|
Rosco86
|
| posted on 7/4/15 at 08:29 PM |
|
|
Coming along nicely mate, such a big job but will be worth it to have something one off!
|
|
|
bart
|
| posted on 15/4/15 at 12:22 PM |
|
|
disaster but retrievable i think
disaster but retrievable i think
I have now rubbed down , filled , rubbed down , filled and so on and so on umpteen times including 2 thick coats of easy composite polyester resin
primmer and a coat of gloss as well.
now the problem.
I used pu insulation board to make the buck , fine does not interact with resin no problem .
BUT !
it does move like a fiddlers elbow with temperature and the pressure of sanding. ( to lower density !)
so I rub down ( tried hard pressure , low pressure ) and the body looks perfect could not be happier
leave for an hour or so and its crap ( only talking 0.2 to 1mm here ) I can see and feel the sunken form skeleton.
enough to make a bad mould.
solution ( for that read copious moaning and tea drinking and thinking )
I had the idea that I need to stabilize and give strength to the surface .
so I hatched a plan cover the outside with a thin layer o woven cloth and resin
spoke to easy composite's . ( very very helpful and friendly, highly recommended ) . and they agreed
so that's the plan , never mind the last four weeks DOWN THE PAN.
so waiting for the delivery , and then its forwards I HOPE !
so a warning to all
1) if making a skeleton type buck with pu foam infill , use cheap insulation for the underlying bulk then the proper high density for the outside
1>2" id say
2) if its a large buck you will need more than the 2 coats of primer stated on the easy composite video , having spoke to them 5 or 6 thick coats or
more for large surface areas !
3) don't flog a dead horse , hopping it will get better , step back analyse problem , " then flog the dead horse " lol ! , no !
change tactics .
4) hopefully there's a solution to every problem apart from inevitable death
if any one thinks I should list this warning separately for all those that don't look at this posting let me know and I will do , but i'll
leave out the inevitable death part !

[Edited on 15/4/15 by bart]
BE ALERT > BRITAIN NEEDS LERTS
|
|
|
Fred W B
|
| posted on 15/4/15 at 07:21 PM |
|
|
I made my pattern with foam and plywood, then applied some filler, then a layer of chopped strand matt and resin, then a lot of body filler and
finally some surfacing filler, and I still had some evidence of rib print through in some areas. If I did it again (ha ha ha ha!) I would put 2 layers
of CSM on.
Cheers
Fred W B
[Edited on 15/4/15 by Fred W B]
You can do it quickly. You can do it cheap. You can do it right. Pick any two.
|
|
|
bart
|
| posted on 23/4/15 at 10:17 PM |
|
|
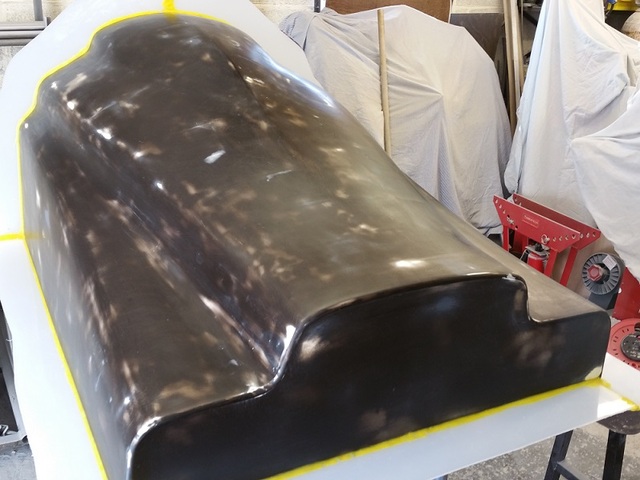
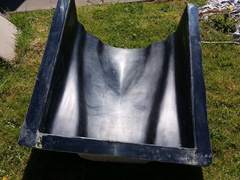
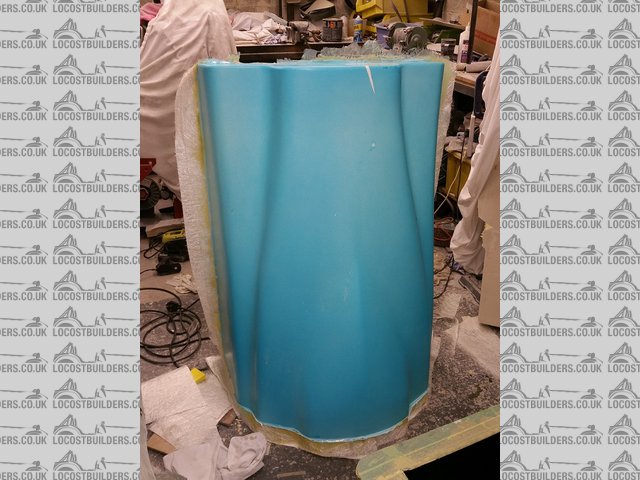
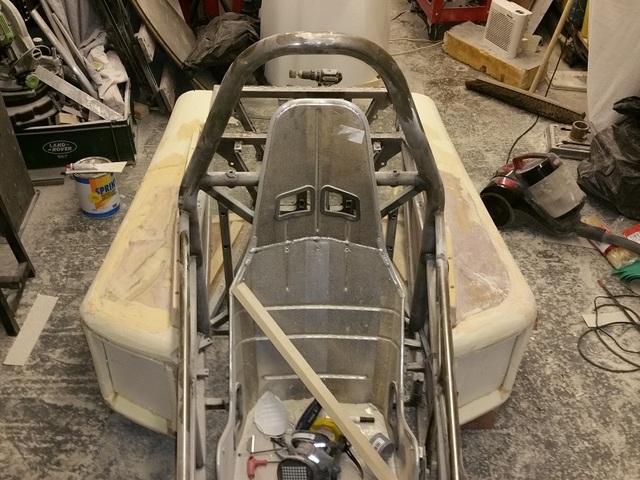
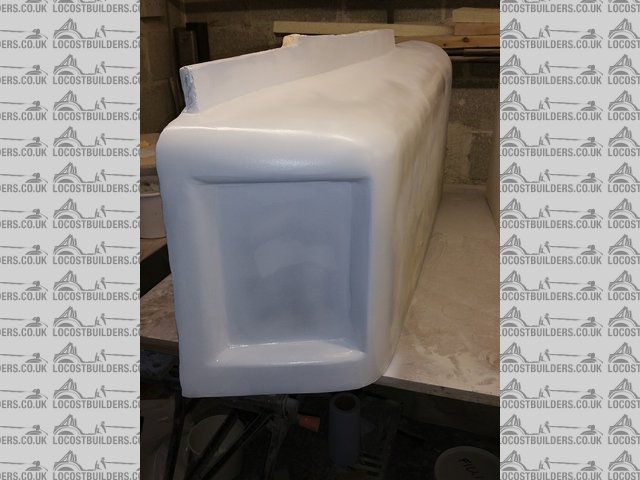
just ready for gel coat
just ready for gel coat
fibre glass tomorrow
Description
BE ALERT > BRITAIN NEEDS LERTS
|
|
|
bart
|
| posted on 27/4/15 at 12:41 PM |
|
|
dispair , a plan , defeat , triumph , relief , joy
defeat , a plan ,triumph , relief , joy
well hello all .
1st Despair and defeat
no matter what I tried , I could not get the buck to behave , I could get it perfect then 1 hour later skeleton marks would appear again , this is in
spite of several thick coats of resin , I was going to fibre glass the buck then fill again and reshape but that would have made it to big so that was
not an option. ( to be truthful I was also completely p****d off with it )
2nd A plan emerges
so I decided that all of the defects where negative on the buck so they would be positive on the mould . so I thinks **** this
ill make the mould and rework the mould as all the defects will be proud and easy to address.
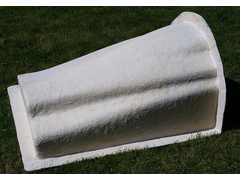
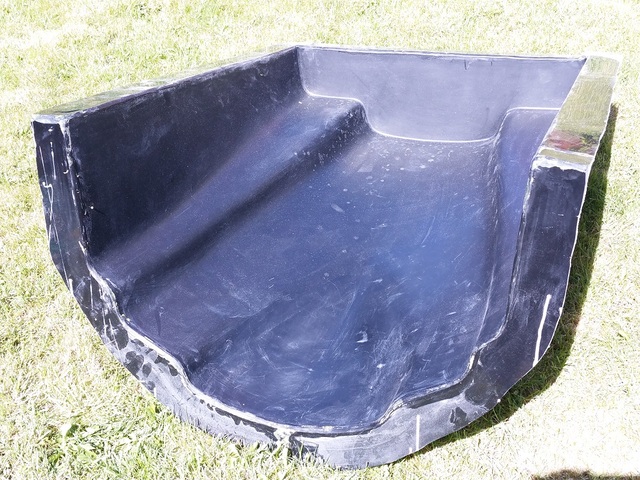
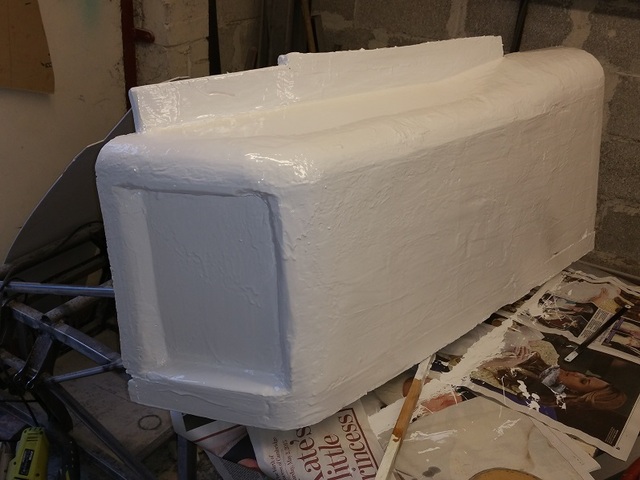
3rd triumph , relief and joy
so extra thick coat of gel coat * 2 to allow for rework 2 thick coupling coats , and 4 coats of uni mould ( brilliant stuff if very hard work ) , had
a problem after coupling coat I got Nora virus that night and could not work the next day and you only get 48 hours to get the outer coats on , did it
the following day still ill and not eaten and drank any thing for 36 hrs , nearly passed out several times . " message to self I am a brave
little soldier " " my mummy said so" 
wait 24 nervous hours to cure
up end the mould , 4 large plastic wedges and a big rubber mallet .
tap tap , tap tap , wack wack , WACK WACK , out it pops ,perfect ! oh the relief of a released mould !
now need to let it season for 48 hours then wet and dry any scratches ( positive on the mould ! ) and re polish the mould , job done I hope
Description
Description
Description
the surface looks a lot worse than it actually is on the pics due to release wax , dust from the garage ect , wont take much to flat .
 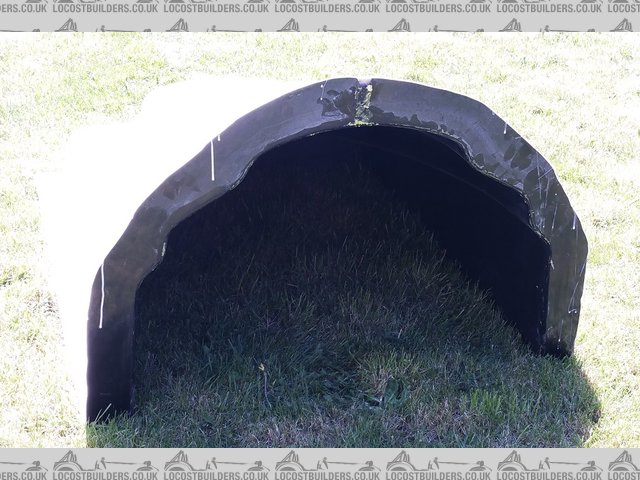
Description
finally the worlds most expensive dog kennel ! and I don't even have a dog .
[Edited on 27/4/15 by bart]
BE ALERT > BRITAIN NEEDS LERTS
|
|
|
cloudy
|
| posted on 28/4/15 at 07:29 AM |
|
|
Always a scary moment! Glad it's good - are you planning to infuse the part?
www.warnercars.com
|
|
|
ceebmoj
|
| posted on 28/4/15 at 07:49 AM |
|
|
Great progress.
Its threads like this that make me avoid bodywork and GRP
|
|
|
bart
|
| posted on 28/4/15 at 10:32 AM |
|
|
carbon infusion
hi had 24 hrs to relax
so thanks for the reply posts.
yes looks like wet lay infusion over carbon cloth .
this is for 2 reasons
heat - parts going over engine and exhaust
and lightness
what I might do is make a cheap fibre glass part first just to check fit over frame
I also need to make this part before I can continue with other parts .
then i'm thinking do all the infusion and high temp cook off in one go. well over a month.
adding some supports to the back later today so I can turn the mould on its back and work on it.
also will add extra strength although the mould is very strong
so its hunt the vacuum pump some time this week
BE ALERT > BRITAIN NEEDS LERTS
|
|
|
cloudy
|
| posted on 28/4/15 at 11:28 AM |
|
|
Not sure how you could do wet lay infusion! - it's either wet lay, or infusion (vartm)
I've found pulling a cheap part with CSM GRP is worth it, helps the mould's surface reactivity - grouping all your infusions helps you get
in the 'groove' seems wise, smaller parts you can parallel run.
easy composites pump is good (if pricey)
www.warnercars.com
|
|
|
bart
|
| posted on 28/4/15 at 11:43 AM |
|
|
thought infusion was suck in the resin ie: wet lay , don't understand the technical term difference
is wet lay just paint on and per ordinary fibre glassing
any how i'm going to suck it in ! using high temp epoxy resin from easy composites
BE ALERT > BRITAIN NEEDS LERTS
|
|
|
cloudy
|
| posted on 28/4/15 at 12:42 PM |
|
|
Yes wet lay is painted on resin- though you can wet lay and then vacuum bag to consolidate. infusion is a "dry" process
[Edited on 28/4/15 by cloudy]
www.warnercars.com
|
|
|
bart
|
| posted on 28/4/15 at 12:57 PM |
|
|
the one I intend to do is as per the easy composites bonnet video
dry cloth
packing bulking layer
dry cloth
suck in the wet resin - so what ever that's called i'm'a going to do that .
ps : this is all new to me , leaning as I go along , before id started I had never even fibre glassed a hole in a car wing before .
BE ALERT > BRITAIN NEEDS LERTS
|
|
|
bart
|
| posted on 4/5/15 at 09:27 PM |
|
|
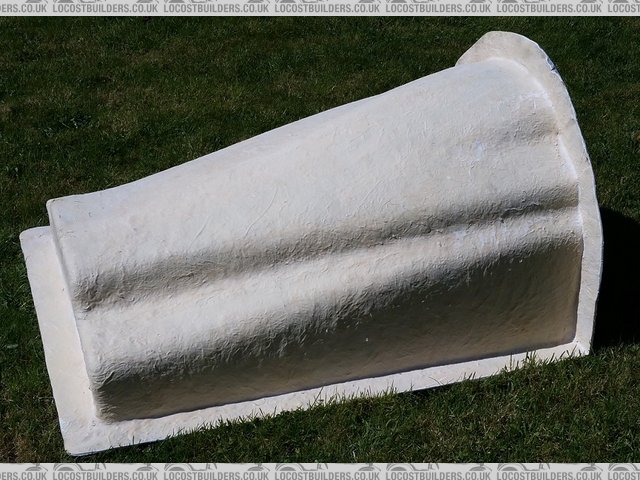
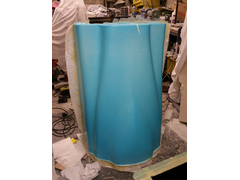
its a BOY , GIRL , REAR BODY PANEL
well just finished making the first rear panel
so thought id rush in and post a pic
last couple of days flatted the mould.
was warned that first out of the mould can be tricky so
8 coats of wax
and 3 sprayed coats of blue pva ( that's what's in the pick by the way the parts white )
this is only a test part for fitting as the correct part will be carbon fibre
made the part from 1 heavy coat of white gel coat
2 coats of 450 grm matt
then leaving it only 3 hours ( to stop sticking )
out it popped
I shall be naming the baby - rear engine cover the 1st
Description
BE ALERT > BRITAIN NEEDS LERTS
|
|
|
cloudy
|
| posted on 5/5/15 at 07:59 AM |
|
|
Wahey!  Great start Great start
www.warnercars.com
|
|
|
bart
|
| posted on 5/5/15 at 09:51 PM |
|
|
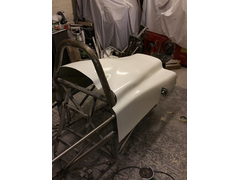
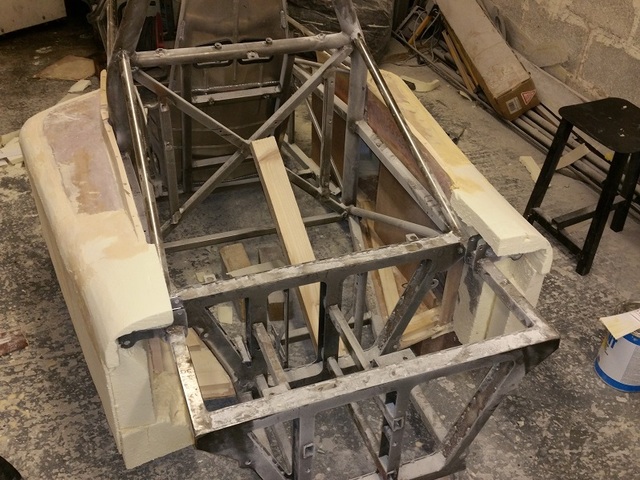
basic trim and fit to chassis for a look see
needs further trimming , BUT its filled me with enthusiasm again , well a bit more than I had!
Description
BE ALERT > BRITAIN NEEDS LERTS
|
|
|
bart
|
| posted on 6/5/15 at 06:48 PM |
|
|
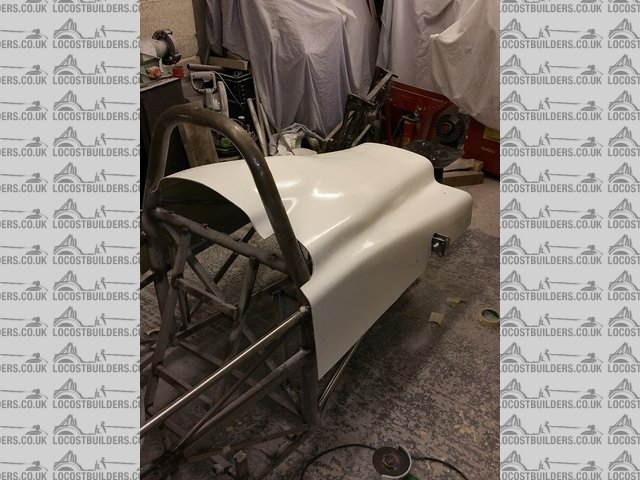
further trim
now trimmed to height all round and trimmed to accept side pod LH
looking tomorrow to trim side pod and start to finish side pod ,
also thinking about rear lower panel , this should be quite simple as it should be just mdf shaped to size ( we shall see ! )
 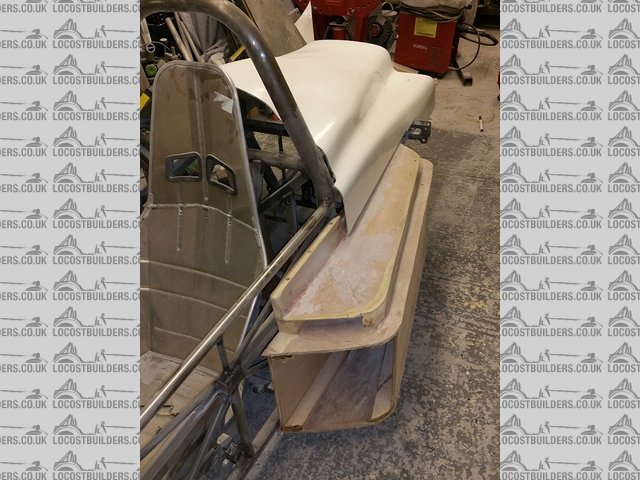
Description
also looking to extend side pod top to cover shock mount , that should avoid an iva problem
could not decide what to do with this area , the solution has only become apparent now I can see it "in the real"
Description
BE ALERT > BRITAIN NEEDS LERTS
|
|
|
ceebmoj
|
| posted on 6/5/15 at 09:11 PM |
|
|
looks great
|
|
|
bart
|
| posted on 7/5/15 at 08:15 PM |
|
|
side pod work
well hello all
managed to get 4 hours on the car today
started to work on the side pods now I can see what's happening with the rear engine cover
its amazing what a bit of glue , some pu foam sheet and some bondo will do.
extended the rear of the side pod to cover the rear spring hanger
my only concern is i'm working free hand and I have to make the RH side pod the same . should be doable
my aim tomorrow is add some run off patches and slap a coat of fibre glass on to stiffen it all up and counteract the foam moving
" see I am learning from my mistakes" !
also did a lot of the pu sanding outside , I think the neighbours was not expecting snow !!!!
first reminder of how it was
Description
front view LH side pod basic shape archived just needs a bit o fettling
Description
rear view showing over spring add on
Description
BE ALERT > BRITAIN NEEDS LERTS
|
|
|
bart
|
| posted on 7/5/15 at 08:23 PM |
|
|
oh and just to say this mould needs to be a split mould to avoid locking
I recon it would come out but i'm not going to take the chance.
BE ALERT > BRITAIN NEEDS LERTS
|
|
|
bart
|
| posted on 8/5/15 at 09:21 PM |
|
|
a good day further progress
had a good day today further progress
finished roughing the mouth area of the LH side
and the brought the RH side up to the same spec and they are quite symmetrical , to my eyes anyway
trotting on nicely now but wont be working on it tomorrow mothers 80th birthday party !
still back on it Sunday , interrupted by the f1 grand prix.
will look to rough sand them , get them fully symmetrical and ready for over coat of fibreglass to stiffen it all up
going to make the rear panel as well so three moulds at once ! " getting cocky now" something's bound to go wrong !
had a good look at the shape and recon the moulding will come out without a split which make things much easier .
here's todays end pics
Description
Description
BE ALERT > BRITAIN NEEDS LERTS
|
|
|
bart
|
| posted on 10/5/15 at 07:34 PM |
|
|
good day at the office
well I watched the f1 , boring !
and then went out and got down to it
first both sides are more or less identical now.
so did final frame fit then extended the run off areas for the fibre glass
ps: that's why they now look out of proportion in the pics
will put strengthen flanges on very last job as easier to sand down and work on without them
gave them both a really thick coat of gel coat " makes the look awful
but it will be a good base to sand down
then I can plasticien any roundy bits I need mainly round the air intake
and then add a strengthening layer of fibre glass to act as a base for filling and sanding.
must admit the look awful in the pics , nothing 30 minutes with a da sander wont fix oh and a tub of bondo
Description
Description
BE ALERT > BRITAIN NEEDS LERTS
|
|
|
bart
|
| posted on 19/5/15 at 08:32 PM |
|
|
Further side pod action
hi all
i've been doing work on the side pods but its a bit fill sand fill sand so I did not bother taking any further snaps
how ever feel as if I have got somewhere now
was not happy with the shape so I did some free hand remodelling!
much happier with the result now
not finished shaping and filling yet but getting close
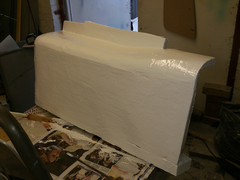
gave the pods a coat of white paint tonight to show up any differences and problems
will let that harden over night and do some more minor filling and sanding tomorrow
my aim is to get ready for mould making by Sunday.
tip !
I'm sure this has been done by others but this tip works really well.
I mixed ordinary fibre glass polyester resin with fillite powder , it makes a spreadable filler that goes hard ( when activated ) in a couple of hours
and is far cheaper and easier to work with that body filler . I mixed a very high 50/50 mix by weight and it worked a treat.
is also very easy to sand. needs a hard layer of resin to finished when moulded but you need to do that as a final thing any way.
its a bit like plastic concrete. WELL GOOD !.
also found a neat way to make a flat side
I got the to and bottom correct then put some gel coat on the side and dragged a straight piece of steel bar across the surface.
bit like floating concrete !
result no hollow patches worked a treat again
 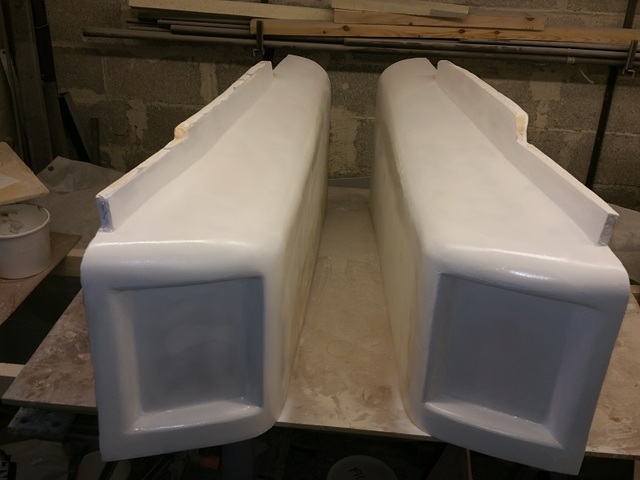
Description
rh and lh together
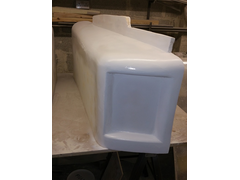 
Description
lh
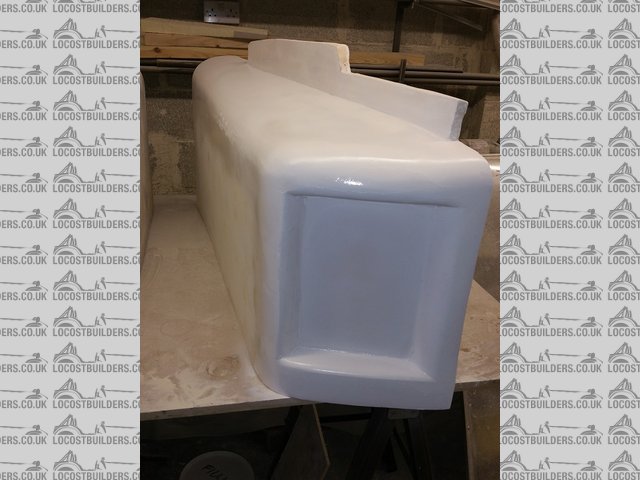
Description
rh
[Edited on 19/5/15 by bart]
BE ALERT > BRITAIN NEEDS LERTS
|
|
|


