craig1410
|
| posted on 20/2/05 at 10:13 PM |

|
|
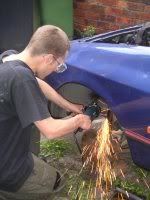
I wouldn't worry toooo much about the hydrogen as it's given off in fairly small amounts unless you are using 10's of Amps, and will
disipate vertically very very quickly. The main precaution is to switch off the power before disconnecting the leads to the anode or cathode to avoid
sparks igniting any gas before it has a chance to escape.
Cheers,
Craig.
|
|
|
|
|
Northy
|
| posted on 20/2/05 at 10:46 PM |
|
|
Here's a picture of the parts I've done so far, ready to be painted black 
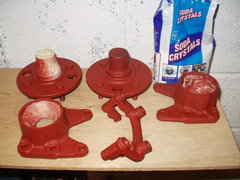 
Rescued attachment Parts primed.jpg
Graham
Website under construction. Help greatfully received as I don't really know what I'm doing!
"If a man says something in the woods and there are no women there, is he still wrong?"
Built 2L 8 Valve Vx Powered Avon
|
|
|
Northy
|
| posted on 20/2/05 at 10:47 PM |
|
|
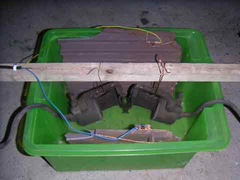
Here's a picture of my set-up. A bit of a lash-up, I've been meaning to make some better wires but it's always in use! 
Rescued attachment Rough rig up.jpg
Graham
Website under construction. Help greatfully received as I don't really know what I'm doing!
"If a man says something in the woods and there are no women there, is he still wrong?"
Built 2L 8 Valve Vx Powered Avon
|
|
|
Steve&Steve
|
| posted on 21/2/05 at 12:04 AM |
|
|
Craig, Fair point on the hydrogen I wont worry too much about theat then, just sensible caution.
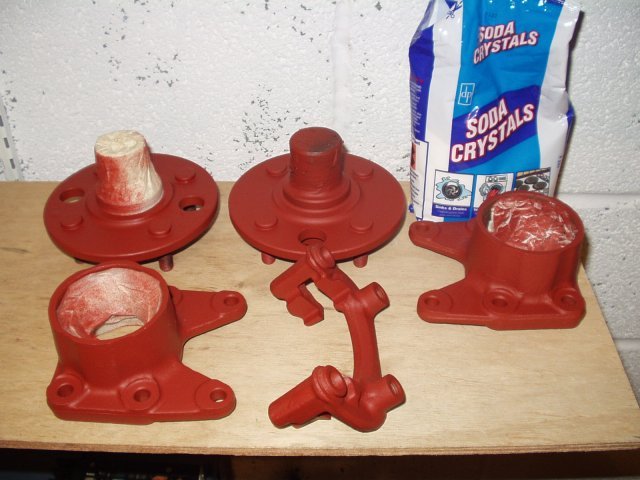
Graham, That setup is very much how I was planning on doing it which is nice to know. But in your picture of the primed de-rusted bits I see you still
have half of you bag of soda crystals left, I was going to whack the whole bag in 

|
|
|
Rob Lane
|
| posted on 21/2/05 at 09:07 AM |
|
|
Graham,
Can't believe I'm going to say this BUT lift the tank up or drop the PSU in level.
Reason, ask which wally turned and knocked over his battery charger from a stool into a drain tray full of oil, whilst switched on ?
One wrecked battery charger, oil everywhere (ba***d stuff) and ripped leads from battery.
Thankfully before I ever attempted electrolysis.
|
|
|
Steve&Steve
|
| posted on 21/2/05 at 11:53 PM |
|
|
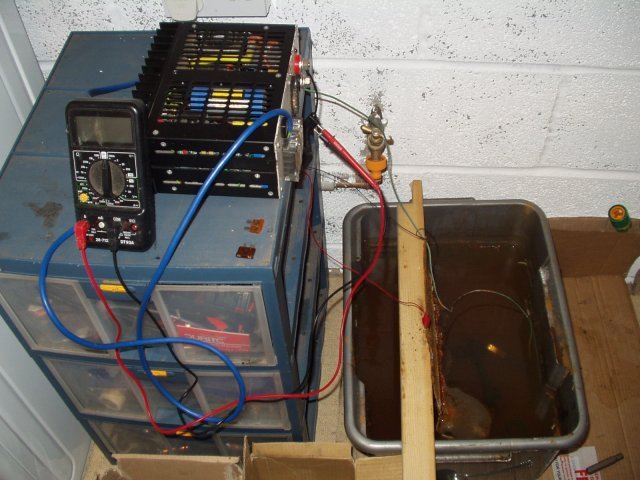
Right I've got it set up and it seems to be doing a good job.
Here's my setup:
Rescued attachment PICT1974.jpg
|
|
|
Steve&Steve
|
| posted on 22/2/05 at 12:00 AM |
|
|
I used some ribbed cast iron plate as the electrode, it gives good surface area and is working well.
I just hung the items up with wire, this didnt connect to one suficently so only one caliper was de-rusted, adding an extra conductive lead solved
this.
 
Rescued attachment PICT1982.jpg
|
|
|
craig1410
|
| posted on 22/2/05 at 12:12 AM |
|
|
Rob,
Good point, I hadn't noticed the precarious PSU ...
Graham, I hope you're still alive and are not too proud to accept a bit of sound advice...
To get you in the spirit, today at work, as part of an I.T. project to build some ticket machines I was asked how many tickets were on a roll of
tickets. I started talking in terms of 2 x PI x Radius of ticket roll taking account of ticket thickness and length etc etc until one of my colleagues
pointed out that inside the roll of tickets it said "1200 Tickets"... I have no pi$$ left as it was all taken out of me earlier
today...
Stay safe,
Craig.
|
|
|
Steve&Steve
|
| posted on 22/2/05 at 12:12 AM |
|
|
I also had trouble with some computer PSU's.
1) Old AT 200W PSU, only worked on 5V, 12V cut it out.
2) Old AT 200W PSU, worked fine giving about 2-3A
2) ATX 300W PSU, again worked on 5V but cut out on 12V
4) ATX 300W PSU, working well giving 5-6A
so it lookes like some PSU's have trips in them!
Final overview pic of setup:
 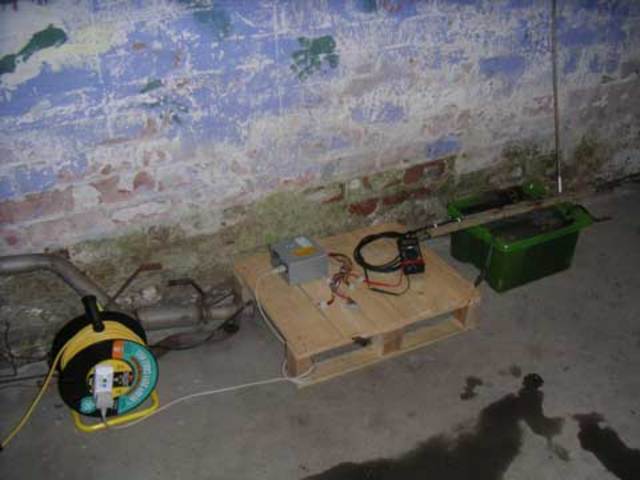
Rescued attachment PICT1987.jpg
|
|
|
the moa 2
|
| posted on 22/2/05 at 07:26 PM |
|
|
Just a note to say thanks works a treat only down side is that im almost finished my kit so would have been handy at the start.
|
|
|
Bart69
|
| posted on 23/3/05 at 08:37 PM |
|
|
WHAWWL brilliant Top tip
Hardly fixed a car today at work to busy creating bubbles.
Tried a bit of 25mm tube at first and it worked slowly so i made a half circle out of sheet steel that i use on mot repairs and it works great.
There is some rust proofing on the steel that is leaving a green residue all over the plate is this normal or some other more devious chemical
reaction.
|
|
|
jcduroc
|
| posted on 4/4/05 at 03:42 PM |
|
|
Electrolysis rust cleaning
quote:
Originally posted by Steve&Steve
I used some ribbed cast iron plate as the electrode, it gives good surface area and is working well.
Can we use a fully charged car battery?
JCM
|
|
|
Bart69
|
| posted on 4/4/05 at 05:34 PM |
|
|
I Think it may cause problems with any inadvertent short circuit as a battery isnt current limited where'ase a charger will current limit or
trip a fuse.
cheers
Graham
|
|
|
Dave Bailey
|
| posted on 14/6/05 at 06:25 PM |
|
|
Cleaning drive shafts....
Anyone used this process to clean the drive shafts from a 4*4 LSD. I am concerened about the grease in the joints either end. Is is possible to push
the bearings out then clean them. I have removed the circlips and have each drive shaft in three bits with the boots removed.
ta!
|
|
|
omega 24 v6
|
| posted on 16/6/05 at 07:04 PM |
|
|
Just spent two hours watching my hubs bubble away and WOW this really does work. This is going to save so much time and mess now all i need is a
bigger plate and tank.
|
|
|
omega 24 v6
|
| posted on 16/6/05 at 08:32 PM |
|
|
Now i've got it going can you answer a few questions lads.
At the moment it only draws 1 amp from the charger. It's a 12volt jobie and i'm wondering if the process would speed up if i changed to
24v instead.
Is it possible to up the current by altering the solution at all.
Or am i just being impatient and inquisitive for more information.
|
|
|
Northy
|
| posted on 16/6/05 at 09:38 PM |
|
|
Add more soda crystals, that'll speed it up. And move the metal plate closer to the thing your cleaning.
Graham
Website under construction. Help greatfully received as I don't really know what I'm doing!
"If a man says something in the woods and there are no women there, is he still wrong?"
Built 2L 8 Valve Vx Powered Avon
|
|
|
Sirius
|
| posted on 8/1/06 at 07:20 PM |
|
|
Sorry to dig this old thread back up....
I've been doing some electrolysis of my own over the past few days as part of refurbishing my old sierra front hubs.
Im now at the stage where all the rust has gone and I am left with a black surface. I had a brief scrub with a wire brush to remove the last bits of
'flaky rust' and found that this black surface brushes off to leave a more silvery surface underneath.
Are people painting onto the black surface, or blasting that off somehow and then painting onto the silvery surface underneath?
Thanks
|
|
|
omega 24 v6
|
| posted on 8/1/06 at 09:56 PM |
|
|
wire brush in the leccy drill and paint the silver surface.
|
|
|
craig1410
|
| posted on 8/1/06 at 11:28 PM |
|
|
Hi,
As said above, scrub the black stuff off and paint immediately. Don't leave it lying around as it will rust again very quickly. Use an etching
primer if you can or a zinc based primer to get a good grip on the bare metal.
Cheers,
Craig.
|
|
|
Sirius
|
| posted on 9/1/06 at 02:50 PM |
|
|
Thanks folks
|
|
|
phillippe
|
 posted on 12/1/06 at 06:53 PM posted on 12/1/06 at 06:53 PM |
|
|
...
VERRY IMPRESED...
|
|
|
wment
|
| posted on 15/1/06 at 07:48 PM |
|
|
Just a note on the anode material used in the solution for this process. Using nickel rich material like stainless steel will create a solution that
contains nickel. Nickel solutions have been linked to cancer. Stick with the iron/steel as an anode.
|
|
|
MkIndy7
|
| posted on 10/2/06 at 07:27 PM |
|
|
I think this has been asked before but after scanning through I haven't found a definate answer,
Can Alloy parts be used in the same process, like alternator casings etc? or does it only work on cast and steel pieces.
|
|
|
Liam
|
| posted on 10/2/06 at 08:47 PM |
|
|
Ally doesn't rust in the first place so there isn't any to remove. Something might happen to ally in the tank but I dont know
what. Why not find out on something disposable?
LIam
|
|
|