MakeEverything
|
| posted on 14/4/12 at 04:25 PM |

|
|
Excellent. You need to get it in and running in less than 12 hours to beat my record!  
Kindest Regards,
Richard.
...You can make it foolProof, but youll never make it Idiot Proof!...
|
|
|
|
|
scudderfish
|
| posted on 15/4/12 at 01:50 PM |
|
|
Boo!
Looking closer at one of the heads, one of the threads to hold the inlet manifold on is buggered :-

I'll have to take it off and give it to Power Units again to helicoil. The potentially tricky bit is that the hole is not at 90 degrees to the
face.....
I also made a start at stripping off the crappy flaky paint on my inlet manifold and got this far before realising a face mask would be a _really_
good idea.

|
|
|
MakeEverything
|
| posted on 15/4/12 at 10:18 PM |
|
|
mate, 30 seconds with a sand blaster would be an ideal solution to remove the paint.... Itll etch it too for re-painting.
Regards the helicoil, what size is it? Dont pay Power units, its soooo easy to do.
Kindest Regards,
Richard.
...You can make it foolProof, but youll never make it Idiot Proof!...
|
|
|
scudderfish
|
| posted on 17/5/12 at 11:43 AM |
|
|
Right a month has gone by and finally a bit more progress. I took the head to Power Units and they put in a threaded insert and then grinded it back
flush to the face of the head. A helicoil wouldn't have worked as well as the hole is not at 90 degrees to the face. I took the inlet manifold
over to Richard's and he did a great job of removing the paint (thanks!) He warned me that the surface would be porous and soak up any loose
oil (it's a RV8, there's going to be a lot of loose oil ) so I gave it a few coats of high temp black paint. It's not going to
get that hot, but it is what I had to hand. I quite like the matte black.

Getting the rocker covers on was a little tricky as the passenger side one fouls on the inlet manifold


Some deft use of the angry grinder got it together though.
|
|
|
scudderfish
|
| posted on 17/5/12 at 11:47 AM |
|
|
I hit 'post' instead of 'preview', so this should have been part of the last post.
Next task is to get change how the engine fits to the stand. Right now, it's mounted at the rear, but I need to connect it sideways onto the
stand so I can sort out the rear seal, flywheel & clutch.
|
|
|
Irony
|
| posted on 17/5/12 at 12:05 PM |
|
|
When mounting the gearbox, clutch etc. I knocked up a quick timber frame made from rough sawn 3in x 3in timber. Cheap and it worked.
|
|
|
scudderfish
|
| posted on 24/5/12 at 04:00 PM |
|
|
D'oh!
I forgot to fit the rear seal on the crank. Jobs for tomorrow - engine over, sump off, loosen rear crank block, seal on, tighten rear crank block,
sump on, right engine, back to where I should have been.
|
|
|
Xtreme Kermit
|
| posted on 24/5/12 at 07:28 PM |
|
|
Well at least you noticed... 
|
|
|
scudderfish
|
| posted on 14/6/12 at 12:19 PM |
|
|
Slight delay caused by doing my back in (the drugs I got from the doctor were most excellent though) and school holidays. Anyway, enough flannel, I
got the crank seal in, flywheel on and fitted the clutch this morning.

Now to get the crank pulley on. I'm using the one from my current engine and is seems to have an ever so slightly smaller hole  Once
that's on, I can fit the crank sensor and then I'm at the point where I need to hoik the old engine out. Scary! Once
that's on, I can fit the crank sensor and then I'm at the point where I need to hoik the old engine out. Scary!
|
|
|
Xtreme Kermit
|
| posted on 14/6/12 at 08:38 PM |
|
|
Oh it's going to be good 
|
|
|
MakeEverything
|
| posted on 15/6/12 at 10:00 AM |
|
|
Can wait!! hurry up!
Kindest Regards,
Richard.
...You can make it foolProof, but youll never make it Idiot Proof!...
|
|
|
shaft
|
| posted on 15/6/12 at 10:28 AM |
|
|
Looking good there, should be a rocket ship with that in it. 
I'm just building a 3.9 up for my Zero ready to transplant come this winter.
[img]http:// http://m575.photobucket.com/albumview/albums/shaft_Zero/Replacement%20engine%20rebuild/IMAG0283.jpg.html?o=3&newest=1[/img]
Can anybody sort my pic ?? Not sure what I've done wrong? Other than being dim!
[Edited on 15/6/12 by shaft]
my opinion might be wrong you know...
My Zero Build Pics
|
|
|
Alfa145
|
| posted on 15/6/12 at 10:47 AM |
|
|
Here you go Mr Dim

link to the album:
http://s575.photobucket.com/albums/ss195/shaft_Zero/Replacement%20engine%20rebuild/
|
|
|
scudderfish
|
| posted on 30/6/12 at 03:39 PM |
|
|
Small amounts of progress, I've got the clutch slave cylinder off and tie-wrapped it out of the way on the chassis.

I'm really at the end of my talent now I don't see how I'll be capable of getting the old engine out and the new one in and
getting it to all line up again. I positively hate getting underneath my car, and I'm beginning to dread going into the garage. The fun has
gone from this job. If anyone reading this who is relatively local to Harpenden wants to make some beer tokens by doing the actual swap with/for me,
please get in touch over U2U.
|
|
|
DIY Si
|
| posted on 30/6/12 at 05:33 PM |
|
|
Which bits do you think you'll find hard? As long as you can get hold of an engine crane, the actual swap shouldn't take long if you and a
mate can get stuck in. If I was closer I'd happily come over and lend a hand. Just disconnect everything, mark all the wiring with masking tape
as you go and you can't go far wrong.
Let your plans be dark and as impenetratable as night, and when you move, fall like a thunderbolt.
Sun Tzu, The Art of War
My new blog: http://spritecave.blogspot.co.uk/
|
|
|
Xtreme Kermit
|
| posted on 30/6/12 at 09:21 PM |
|
|
Don't loose faith Scud. I'll give you a hand.
|
|
|
Andybarbet
|
| posted on 30/6/12 at 10:06 PM |
|
|
I would gladly pop down mate, im chocka block working away this week & next weekend but i have an empty diary for the 14th/15th July weekend.
I have pretty much no experience but i do have an engine hoist & am willing to help, maybe we could get a couple of us down ? Three heads are
better than one
|
|
|
scudderfish
|
| posted on 1/7/12 at 08:12 AM |
|
|
Thanks I was quite down and depressed when I wrote my previous post, I'm feeling better today. I already have a nice & shiny crane
(I've been using this project to justify new & interesting tools), thanks for the offers.
I'm going to have another go today. I have one major stumbling block getting my propshaft disconnected (see my later thread about it), but I
think I've done all I need to do under the car. I've removed the clutch slave cylinder, and this is the gearbox mount

a plate bolted to two chassis rails, and then it looks like the two centre nuts hold rubber bushes between the plate and the gearbox. I've
managed to get them off leaving bare thread. I hope that when I kick and shove the engine that the threaded rods will pop out of the holes.
If this all goes wrong, expect more miserableness. I hope the next post I make on this thread contains a picture of an empty engine bay...... If it
doesn't I'd be extremely grateful of some help as my mood is flipflopping between 'This is a fun project'/'Where did I
put the petrol & matches'
|
|
|
MakeEverything
|
| posted on 1/7/12 at 02:41 PM |
|
|
Stick with it mate. I had moments like that (this week as well, when i discovered that my fuel tank wont come out without dismantling the
supercharger and exhaust), but it will be worth it in the end.
Failing that, i'll give you £50 as an unfinished project?
Kindest Regards,
Richard.
...You can make it foolProof, but youll never make it Idiot Proof!...
|
|
|
scudderfish
|
| posted on 1/7/12 at 04:40 PM |
|
|
OK, no shot of an empty engine bay as it's still in there, but I have got the prop separated. After talking to Richard I was going to pull my
exhaust off and get at the prop from the bottom. However, on closer inspection, this was going to be tricky.

This header won't fit through the hole in the chassis, and getting the steering column out would mean dismantling the dash and upper pedal
box.....
So back to the remote. My problem appeared to be this, to get it off I'd need to get a screwdriver like blade in here.

As I could only see it in a mirror, time for another plan of attack.
Canting it over, I could get a pair of spanners on a prop bolt

Unfortunately the swing was very limited, and I had to keep reversing the non-ring spanner to get it to fit over the nut. It was at this point I also
discovered that it was a fine pitch thread... Oh joy.
But....... Got the first one out!

So all was going well until I got to the final bolt. It appears that you don't need to get a screwdriver like blade somewhere inaccessible, you
just need to lift the rear of the remote up enough and it pops off. Access for the last bolt was significantly better

Finally, all lined up
And the prop separated.

I'm feeling happier about it now that I've made some progress.
|
|
|
DIY Si
|
| posted on 2/7/12 at 08:13 AM |
|
|
Well done. It's always good to have come away having done something, even if it's not a huge job. Just remember that any big job is merely
a list of smaller jobs, all of which can be tackled one at a time.
Let your plans be dark and as impenetratable as night, and when you move, fall like a thunderbolt.
Sun Tzu, The Art of War
My new blog: http://spritecave.blogspot.co.uk/
|
|
|
sebastiaan
|
 posted on 2/7/12 at 04:55 PM posted on 2/7/12 at 04:55 PM |
|
|
It seems like you are almost there.
Over the years, I've learnt that it alsmost always pays off to dismantle enough parts for you to easily get at whatever bit you need to work on.
Saved me a lot of skinned knuckles, spilt blood and time as well! So, pull that dash out to get at the manifold would be my advice.
Keep at it!
|
|
|
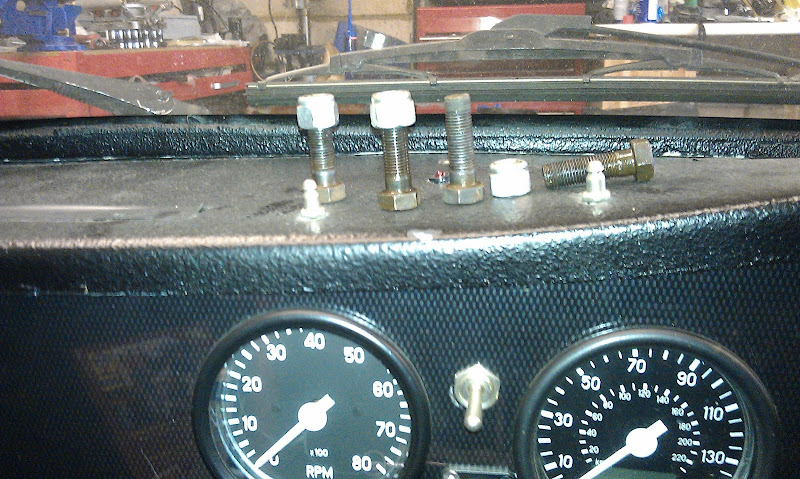
scudderfish
|
| posted on 7/7/12 at 04:37 PM |
|
|

|
|
|
Andybarbet
|
| posted on 7/7/12 at 05:05 PM |
|
|
Success
Well done that man !
|
|
|
scudderfish
|
| posted on 7/7/12 at 05:42 PM |
|
|
It wasn't easy! It would have been impossible without the load leveller as I had to fiddle the angle of the engine so that it would clear the
front suspension and the top of the transmission tunnel.


|
|
|