spdpug98
|
| posted on 6/7/09 at 08:35 AM |

|
|
I have only just stumbled across this thread and all I can say is that this is AWESOME , I praise your patience and craftsmanship just truly
Brilliant! , I praise your patience and craftsmanship just truly
Brilliant!
My Blog: http://spdpug98.wordpress.com/
|
|
|
|
|
ceebmoj
|
| posted on 10/10/09 at 10:52 PM |
|
|
hi there,
any updates cant weight to see how you are getting on
|
|
|
Fred W B
|
| posted on 11/10/09 at 05:35 PM |
|
|
Hi Cee
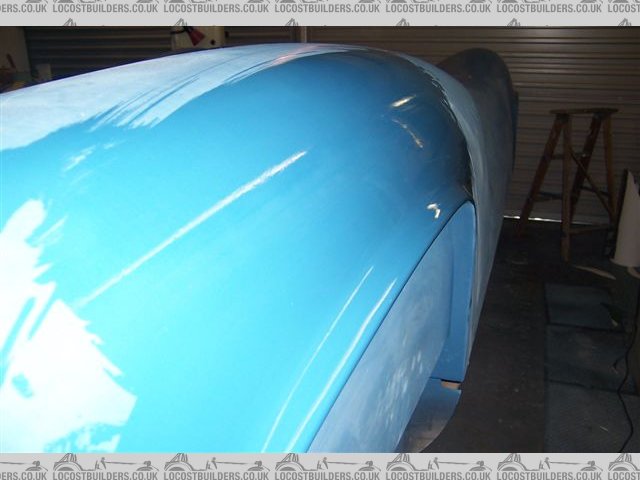
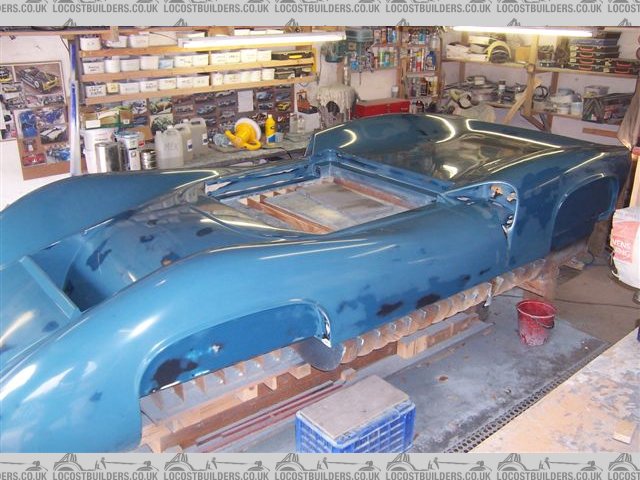
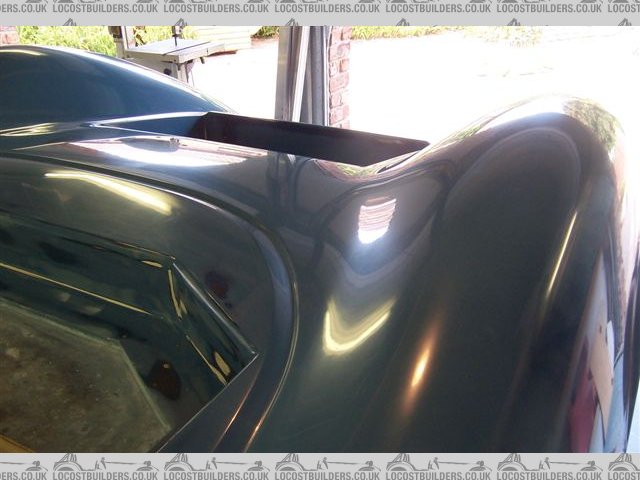
I'm still sanding, working now on a third (and final!) coat of surfacer primer.
The photo below is of 240 grit surface wiped over with a wet cloth to see the surface.
Just starting to move from 240 to 380/400 grit. Have given 600 a go on a small area and the results are most encouraging
Havn't been putting pics up because you can't see much progress, was thinking to wait until I have got the pattern up to polish stage but as
usual some areas needed touch up and reapplication and this holds up progress on the big picture
Something else I have learnt - It would have helped (me, at least, I'm sure the pros have it sussed) a lot to stripe coat the edges and internal
surfaces of recesses with the surfacer primer on a brush before spraying the bulk of the pattern
Cheers
Fred W B
surface
[Edited on 11/10/09 by Fred W B]
You can do it quickly. You can do it cheap. You can do it right. Pick any two.
|
|
|
Fred W B
|
| posted on 11/10/09 at 06:03 PM |
|
|
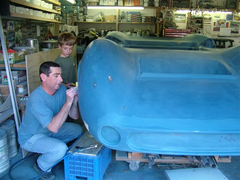
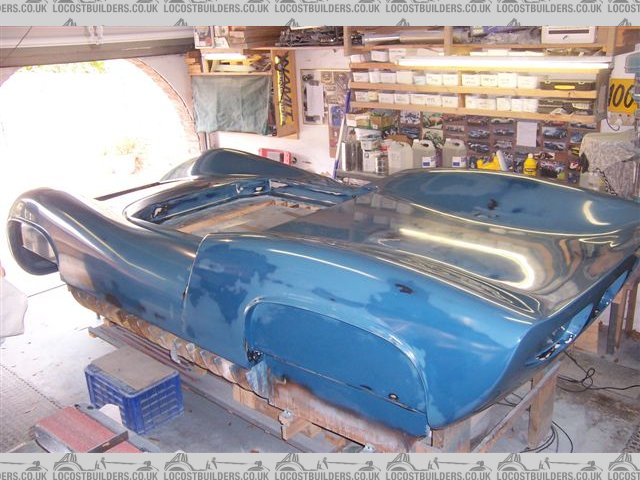
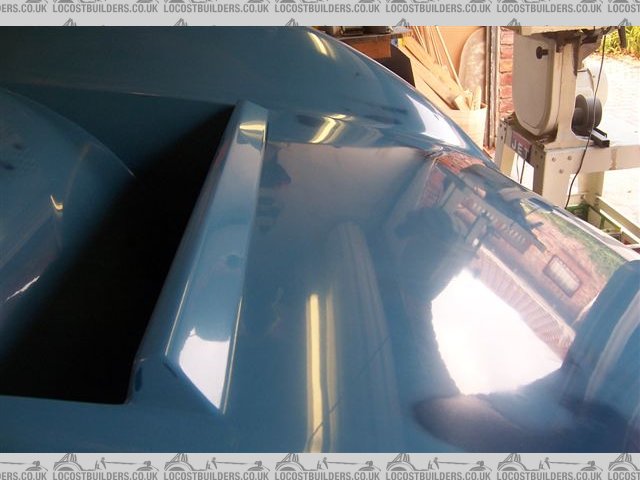
In this photo (of my nephew checking to see if I've got that wheel arch lip blend exactly right....) you can see what the pattern looked like
with the second coat flatted back.
Went through in a couple of places, and as the overspray goes everywhere I ended up giving the whole thing a third coat. The "tide" marks
are because each pot mix is a slightly different colour depending on how much pigment I put in.
Cheers
Fred W B
fred and cv pattern
[Edited on 11/10/09 by Fred W B]
You can do it quickly. You can do it cheap. You can do it right. Pick any two.
|
|
|
ceebmoj
|
| posted on 12/10/09 at 07:31 PM |
|
|
as always your work is an inspiration thanks for the update.
|
|
|
cjtheman
|
| posted on 23/11/09 at 07:24 AM |
|
|
stunning mate keep us upto date with the project
cheers
colin
wanted
sunny weather
sva pass 12/6/09
taxed 16/6/09
|
|
|
violentblue
|
| posted on 23/1/10 at 11:50 PM |
|
|
I'd Imagine you had the mold laid up already, whats the status?
a few pics of my other projects
|
|
|
Fred W B
|
| posted on 24/1/10 at 12:26 PM |
|
|
quote:
I'd Imagine you had the mold laid up already, whats the status?
You would think so, wouldn't you?
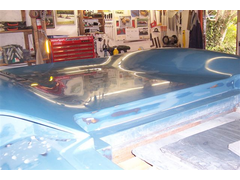
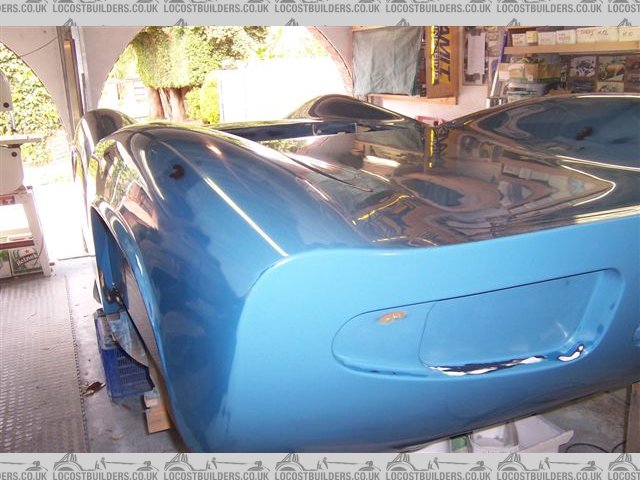
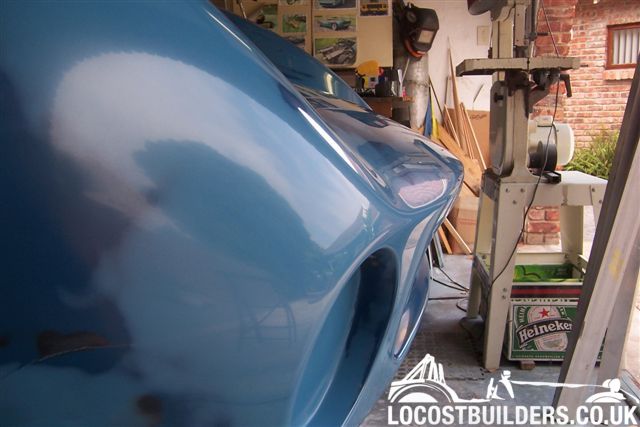
Since the last post the whole pattern has been:
sanded with 360 grit
sanded with 600 grit
sanded with 800 grit
sanded with 1200 grit
and just this weekend I have started with the rubbing compounds. I have been trying to wait till I get the whole thing up to wax level before I post
again but here is a teaser pic
Cheers
Fred W B
pattern jan 10 033
[Edited on 24/1/10 by Fred W B]
You can do it quickly. You can do it cheap. You can do it right. Pick any two.
|
|
|
chrsgrain
|
| posted on 25/1/10 at 10:17 AM |
|
|
That is looking great Fred.. how long until waxing??
The only problem with updating the long running thread is that some people won't see it as they mainly click through from the front page, and I
know most guys on here are really interested in how you are getting on....
Chris
Spoing! - the sound of an irony meter breaking...
|
|
|
Ivan
|
| posted on 25/1/10 at 10:32 AM |
|
|
One of my favourite threads - am subscribed. Fred shows the sort of dedication that I wish I could emulate. 
I would love a body out of his mould.
|
|
|
Dick Bear
|
| posted on 3/2/10 at 11:08 AM |
|
|
Fred,
I haven't been around for a while but just spent the night reading and re-reading the thread. Simply unbelievable! To borrow Steve G's
very appropriate word ...
WOW!
Dick Bear
TextTextTextText
[Edited on 2/3/1010 by Dick Bear]
www.marketpointproductions.com
|
|
|
Fred W B
|
| posted on 3/2/10 at 07:37 PM |
|
|
Thanks guys, still chasing sanding scratches in the surface........
Cheers
Fred W B
You can do it quickly. You can do it cheap. You can do it right. Pick any two.
|
|
|
Fred W B
|
| posted on 7/2/10 at 05:23 PM |
|
|
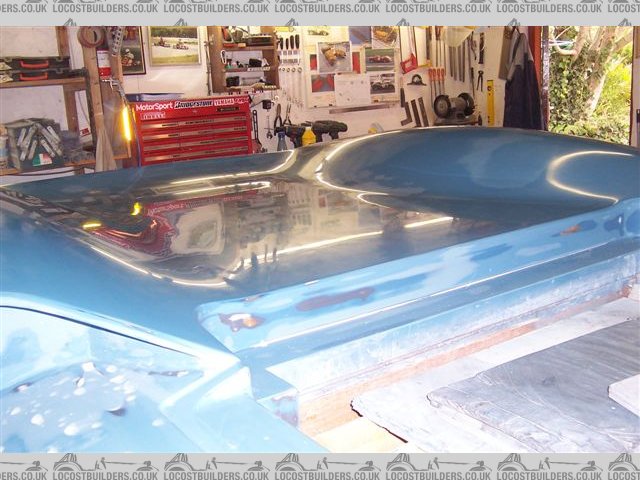
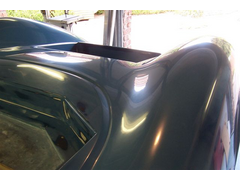
Believe it or not, I have finally put down the sanding blocks, put the cap back on the polishing compounds, and stepped away from the car.
The whole surface of the pattern, including in the recesses and returns has been polished with coarse and then fine cutting paste. As the gloss comes
up as you polish you see some areas where the 1200 has not taken previous grit scratches out so I go back to 1200 grit and then polish again etc, etc,
but finally, finally, I reckon the pattern is FINISHED!
Next time I work on the car, which will be in a couple of weeks time, I will start with the marking out for and making the parting fences for the
moulds.
I include some gratuitous photos. It looks a bit tatty with the three different colours showing but in hindsight it was very helpfull that I pigmented
the first coat of surfacer primer black, the second dark blue and the third light blue. As you sand back you can see where you are, when you get to
the black layer you stop! This was a pure fluke, due only to the pigments my supplier had in stock at the time and not some clever pre planning on my
part.
Cheers
Fred W B
pattern feb 10 - 01
pattern feb 10 - 02
pattern feb 10 - 03
pattern feb 10 - 04
pattern feb 10 - 05
b%2010%20046.jpg
[Edited on 7/2/10 by Fred W B]
[Edited on 7/2/10 by Fred W B]
You can do it quickly. You can do it cheap. You can do it right. Pick any two.
|
|
|
prawnabie
|
| posted on 7/2/10 at 06:12 PM |
|
|
Much respect that looks good enough for the finished article to me!
|
|
|
smart51
|
| posted on 7/2/10 at 06:19 PM |
|
|
It is beautiful. That looks like the sum of a whole lot of hard work to me.
|
|
|
jimmyjoebob
|
| posted on 7/2/10 at 06:39 PM |
|
|
Awesome job, Sir!
If at first you don't succeed, hide all evidence you ever tried!
|
|
|
Richard Quinn
|
| posted on 7/2/10 at 07:34 PM |
|
|
Stunning! Absolutely stunning! I wish I had half your ability and patience!
|
|
|
iank
|
| posted on 7/2/10 at 09:12 PM |
|
|
Brilliant, can't wait to see the final car on the road.
Wonder if fingerprints grow back after a while 
--
Never argue with an idiot. They drag you down to their level, then beat you with experience.
Anonymous
|
|
|
violentblue
|
| posted on 8/2/10 at 03:32 AM |
|
|
in my younger years I built a lot of plugs for Boats. they were a lot of work, but not nearly as complicated as yours. Much respect from someone who
knows what kind of work you've put into it.
[Edited on 8/2/10 by violentblue]
a few pics of my other projects
|
|
|
Ivan
|
| posted on 8/2/10 at 07:25 AM |
|
|
Hi Fred
Congratulations in passing a huge milestone in your project.
I have massive respect for what you are doing.
|
|
|
ceebmoj
|
| posted on 8/2/10 at 08:27 AM |
|
|
that is truly inspiring.
|
|
|
chrsgrain
|
| posted on 8/2/10 at 09:47 PM |
|
|
That is amazing, such dedication, time, energy and attention to detail.... stunning...
Chris
Spoing! - the sound of an irony meter breaking...
|
|
|
sgraber
|
| posted on 8/2/10 at 10:06 PM |
|
|
Fred, as someone who has been there and hopes to never be 'there' again I can only say congratulations on getting to this milestone. Your
dedication and perseverance are exemplary and the photos of your work say everything else about your skills.
Now, take a short break and get on with the moulds! But that's another day. Relish this one as I guarantee that as you look back upon your lifes
accomplishments, this is going to rank up there with the best of them.
Steve Graber
http://www.grabercars.com/
"Quickness through lightness"
|
|
|
alistairolsen
|
| posted on 22/2/10 at 02:23 PM |
|
|
I've just read this whole thread and I can only say its truly amazing. Ive build things using this technique in the past which while the shapes
were similarly complex, the items were tiny. I am in awe of the dedication and the time spent on this and I hope you enjoy your car for a very long
time.
My Build Thread
|
|
|
Neville Jones
|
| posted on 23/2/10 at 05:31 PM |
|
|
Paint/surface that plug with black, then polish it. Put it under fluoro lights parallel to the c/line, look at the reflections.
If you're happy with what you see, THEN make the moulds.
From someone who has done it far too many times.
|
|
|